Activation of Management LAN
This manual describes how to activate the Management LAN.
General
Sometimes network environments do not permit to add new devices into an existing and complex infrastructure. For exactly this problem the IACBOX can make use of an optional third management interface, the Management-LAN. So if the current network infrastructure does not allow you to add your ticket printers or PMS systems you can move them into the Management-LAN network. Note that the Management-LAN network does require a third physical network card in the IACBOX.
The Management-LAN can be activated while installing the IACBOX and also later on. To activate the Management-LAN while installing the IACBOX, you can also use the available Unattended Setup options, which by default does offer the automated installation with 3 network interface cards in german and english. Further information about the Unattended Setup can be found in the corresponding manual page.
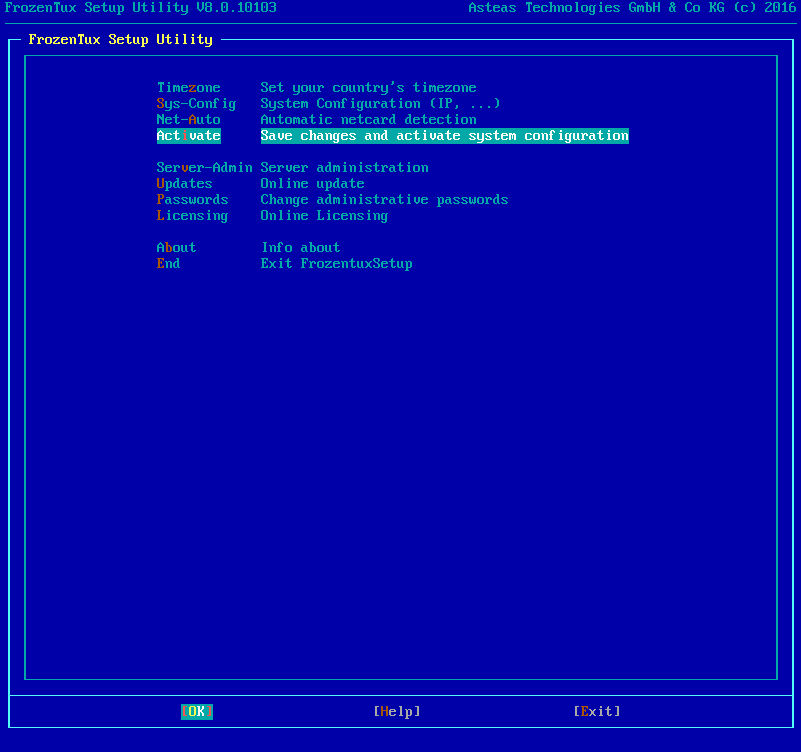
You can also activate the Management-LAN after the IACBOX was already installed. For this variant log on to the console with your “sysop” user. The following setup dialog will show up.
Confirm the dialog with Yes - Continue! to enter the setup menu. First switch to the menu Sys-Config to configure the network settings.
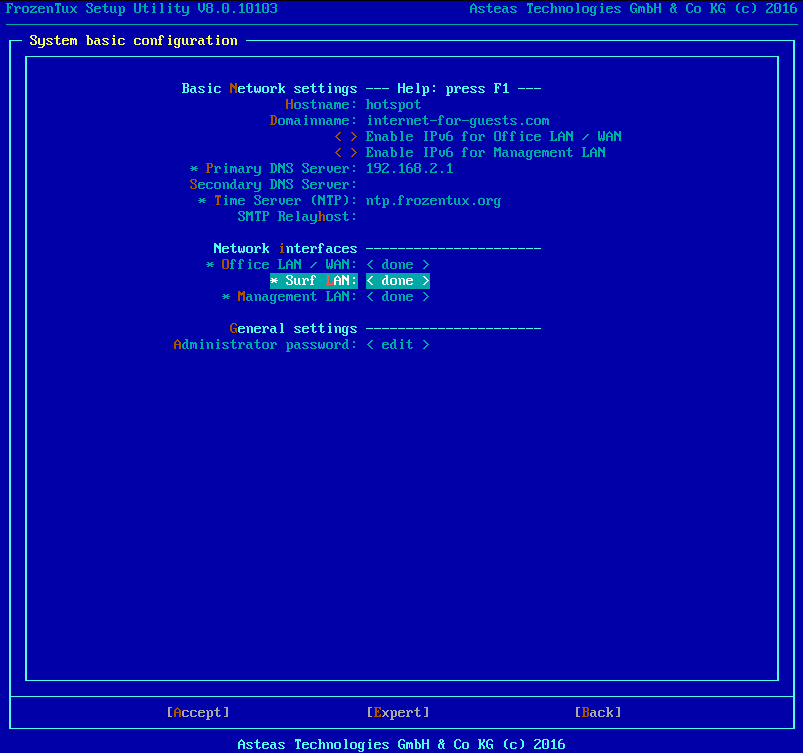
You have to edit all network interfaces in order to activate the third network card at the next step.
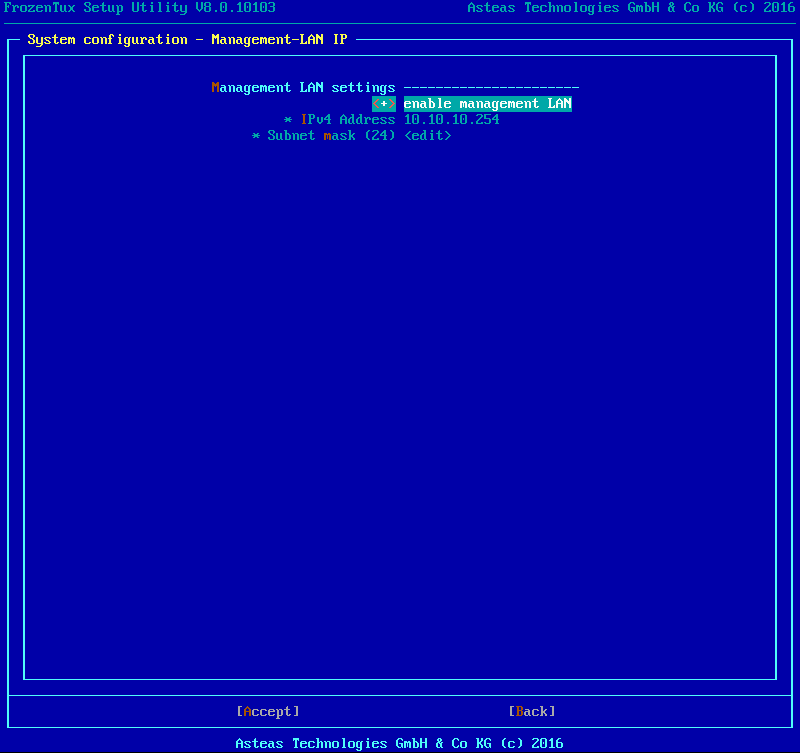
Now the Management-LAN can be configured and activated.
If those steps were carried out as shown in the pictures above, the status of all three network interfaces should have the status done
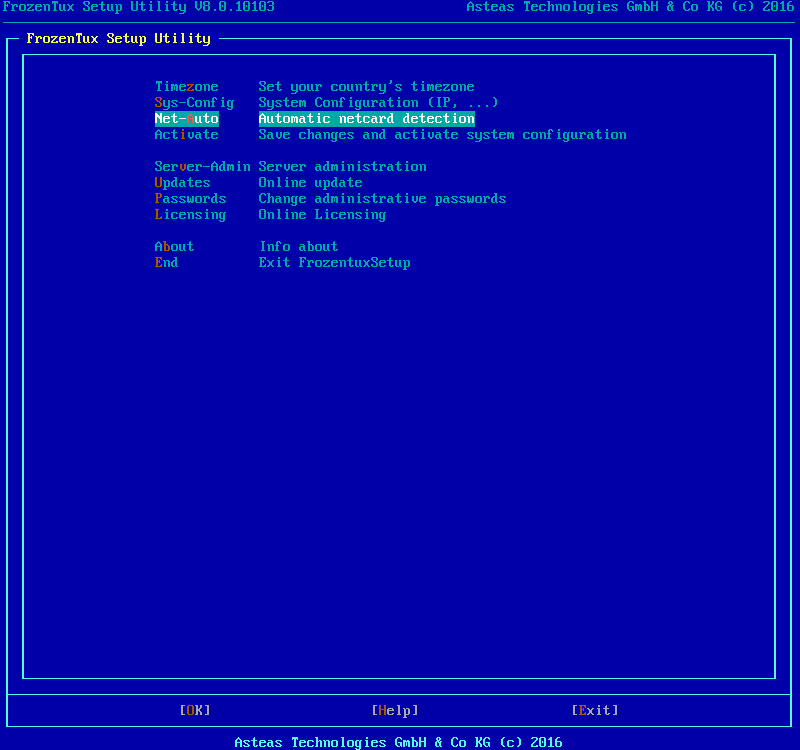
In order to activate the settings, switch back to the main menu and select the menu Net-Auto.
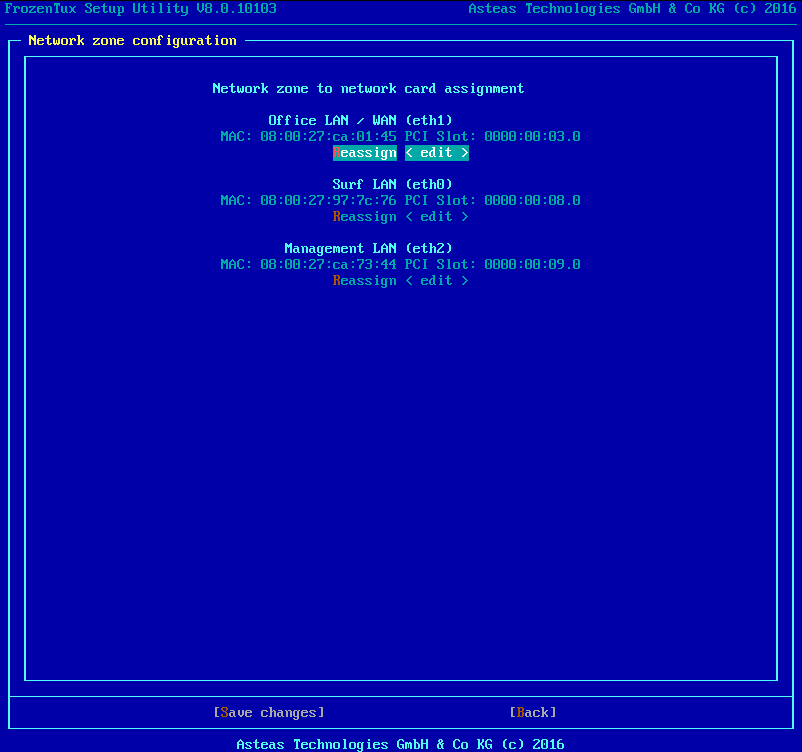
This listing shows the assignment of the network interfaces to the 3 different network zones (Office LAN, Surf LAN, Management LAN). Use Save changes to commit any made changes or use Back to return to the Main Menu.
Now activate the changes made, exit the setup menu and reboot the IACBOX.
After system reboot the Management-LAN can be configured now.
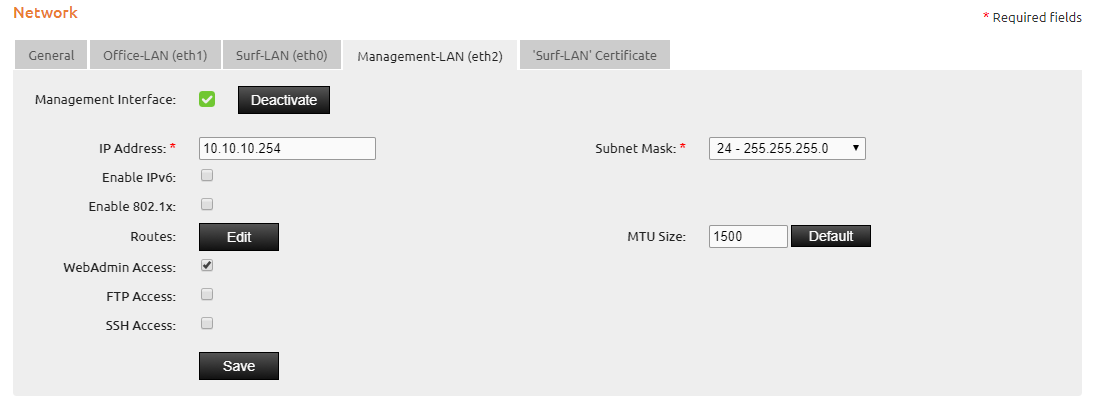
For the Management-LAN network you can also activate WebAdmin Access, FTP access and SSH access to the IACBOX. The IACBOX must be rebooted in order to make the changes take effect. Please note that the network interfaces of the IACBOX can change when a third interface is added. For example, it may occur that the Office-LAN (eth1) interface transforms into the Surf-LAN (eth0) interface after activating the third interface. Thats why it’s strongly recommended to check the network interfaces for changes after the third interface has been activated.