Customize Logon Page
Hint
- HTML and CSS knowledge is required to modify the design of the IACBOX Client Logon Page.
- Note that some templates may be changed by future IACBOX versions. If this is the case, any changes performed need to be migrated again.
- Always use the same template variables as in the original when creating your own template design.
- As an alternative you can also use the built-in feature Redirect before Logon. This allows you to redirect users to a defined website (e.g. corporate website) before the actual logon process. The website defined requires a button/link which then redirects guests back to the IACBOX Client Logon Page for logging in.
Redirect before Logon
With Redirect before Logon it is possible to redirect guest devices to an external website.

This can be used to place hints, additional information, terms of use, restaurant menu cards, etc. on this website.
Since guest devices still have to log in on the regular IACBOX Client Logon Page, they need to be redirected onto it again.
Therefore you may place a button or link on your external website which then redirects the users to the IACBOX Client Logon Page. Use the following link: https://hotspot.internet-for-guests.com/logon/cgi/index.cgi
If you use the feature Free Logon on the IACBOX, you can call a link which would directly log in users via the Free Logon. This is done by sending 2 additional GET parameters which you can find in the link below. https://hotspot.internet-for-guests.com/logon/cgi/index.cgi?freeperperiod=1&accept_termsofuse=1
Note again that for this, the Free Logon must be activated and configured in the WebAdmin menu Tickets / Templates.
Edit HTML templates
In case you want to edit the Client Logon Page directly, you can edit the HTML template files. FTP access is required for transferring the HTML template files to/from the IACBOX system.
Activate the FTP User
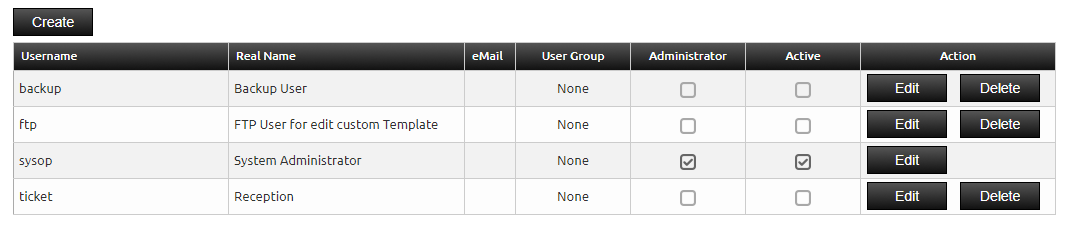
The IACBOX provides an ftp user which is disabled by default. Therefore you have to activate the user and assign a password. Switch to the WebAdmin menu System / Manage User and edit the user ftp.
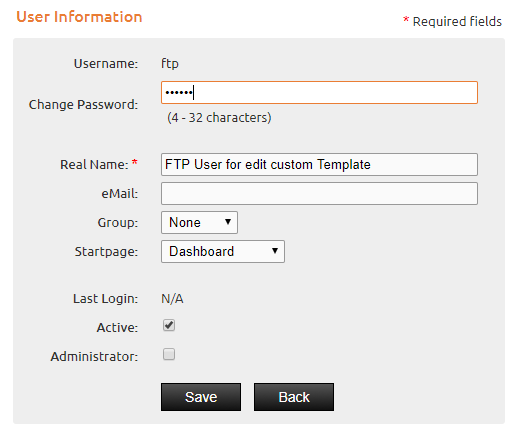
At the window shown below, set a password for the ftp user, activate it and then save the changes.
FTP Service
Next, switch to the menu System / Services and activate the FTP service. The Start button only activates the FTP service temporary (until next system reboot) whereas the Activate button activates the FTP service permanently.

Open FTP port
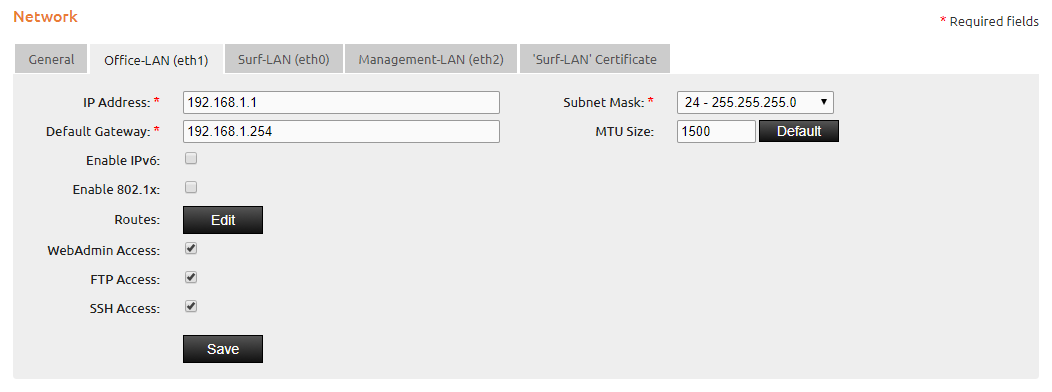
Now you need to open the FTP port in order to access the templates. Therefore switch to the menu Settings / Network and activate FTP Access for the Office-LAN interface. To make the changes take effect, save the settings and then reboot the system.
Activate Custom Design
To modify the Client Logon Page html templates, you have to activate the Custom design setting. Switch to menu Client Logon / Design. In the tab Themes change the Logon Style from Classic Flat - Default to Classic Flat - Custom at the bottom of this page. You can switch back to the default design at any time if something goes wrong.
Hint
- The template files in the FTP directory are only visible after switching to Custom design.
FTP Server Connection
The FTP server supports FTP and SFTP (secure FTP) connections. Use a FTP client of your choice to connect to the server. As host use the IP address of the IACBOX and log in with the credentials of the previously activated FTP user and password.
Directory Structure
The directory modern is currently not in use. Switch to the directory classic to modify the template files.
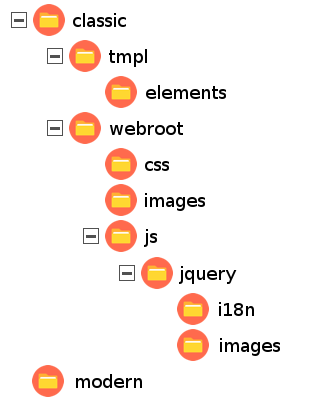
Directory Information:
- tmpl
- Includes HTML template files
- index.tmpl Template file for default logon page
- mobile.tmpl Template file for mobile logon page
- help.tmpl Template file for help
- error-404.tmpl Template file for error 404 page
- dgerror.tmpl Template file for HTTP content filter
- tmpl/elements
- Contains various HTML design elements like checkboxes, input fields, combo boxes etc.
- webroot/css
- Contains CSS files for HTML element styles
- box.css CSS styles for box design (Ticket Logon, Status Information, etc.)
- nobox.css CSS styles for box design of old browser and mobile logon page (e.g. IE6)
- design.css CSS styles for default logon page
- mobile.css CSS styles for mobile logon page
- fix-ie6.css CSS styles for IE6 browser
- fix-ie7.css CSS styles for IE7 browser
- webroot/images
- Contains images for customer logon page
- webroot/js
- Contains Java-Script files for customer logon page
Template Customization
The following part will explain how to edit the now accessible template files based on examples.
Hint
- Changes of the Client Logon Page can not be handled by the IACBOX Support.
- All changes must be performed for the desktop and the mobile template.
Example: Text Replacement
Customization is tricky because almost all texts on the Client Logon Page do depend on many factors and are available in different languages. To replace a text with your own variant a JavaScript must be added at the end of the template you are editing. To replace the title text of the module PMS Room Logon with your own variant, for example Hotel Logon, open the file index.tmpl. Now scroll down to the very bottom of the file index.tmpl and add the following code above the html and body closing tags.
1 2 3 4 5 | <html>
<body>
..
</body>
</html>
|
This customization relates to the CSS class headline. Basically this method can be adapted on all contents.