Plugin configuration
Every plugin is configured differently. Find below more informations regarding the different configuration keys.
Contents
Authentication plugins
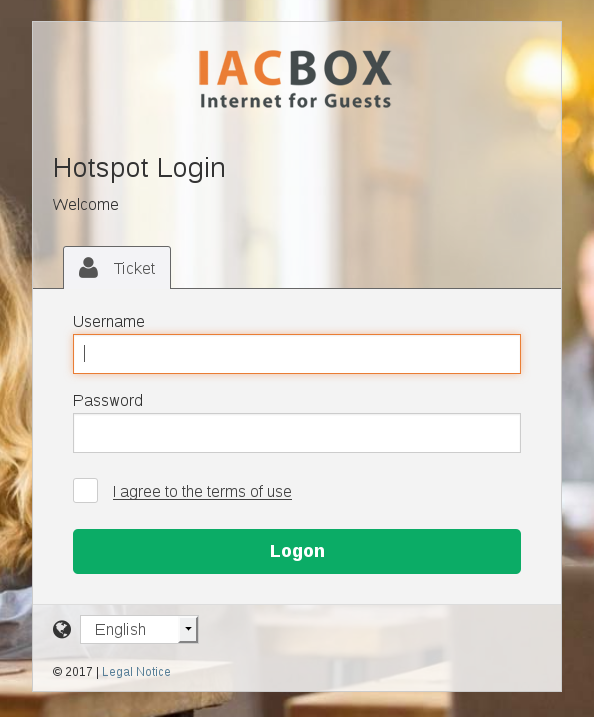
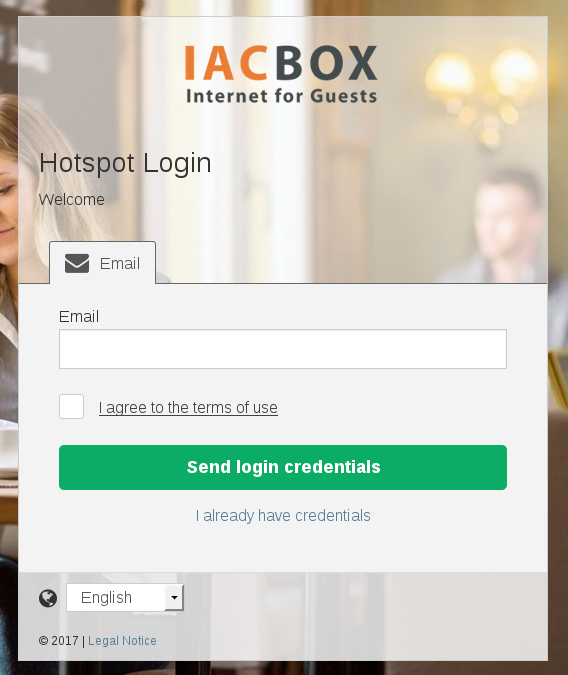
Ticket
The ticket logon is a standard login with credentials (username and password) or any configured external authentication module (e.g. LDAP, radius, …).
| Configuration Key | Since | Mandatory | Default |
|---|---|---|---|
| ticket-icon | 2.0 | Yes | fa fa-user |
| Sets the icon for the plugin | |||
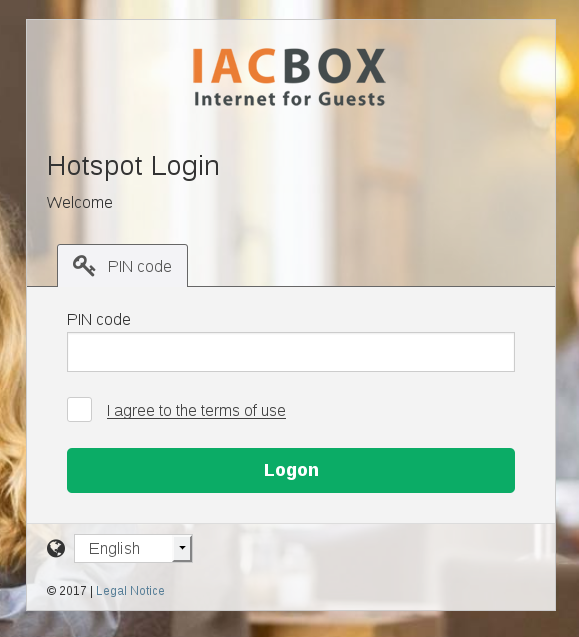
PwdOnly
The pwdonly logon is a standard login with a password. It can be created exactly the same way as when using the default logon page of the IACBOX.
Hint
- The password login has to be activated on the IACBOX.
- The password login has to be enabled in a ticket template.
- For further information see our documentation regarding the Password Login
| Configuration Key | Since | Mandatory | Default |
|---|---|---|---|
| pwdonly-icon | 2.0 | Yes | fa fa-key |
| Sets the icon for the plugin | |||
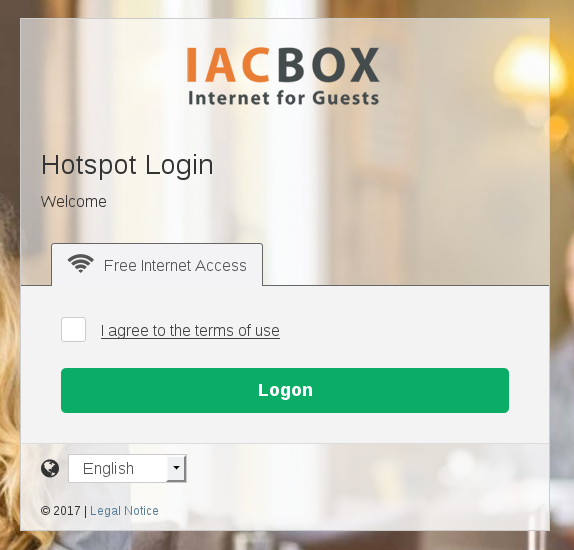
Free
With the free plugin you can take your clients online without any further authentication steps. The plugin supports two different modes:
- free:
- available since API version 2
- linked with Ticket/Templates/Free Logon of the IACBOX
- no ticket overrides available
- to:
- available since version 17.0
- the template, which you configured in Modules/Interfaces/Login API/Custom Logon Page, will be used
- ticket overrides available
| Configuration Key | Since | Mandatory | Default |
|---|---|---|---|
| free-icon | 2.0 | Yes | fa fa-wifi |
| Sets the icon for the plugin | |||
| free-logon-type | 17.0 | Yes | free |
| Determines if the plugin is using the settings of Free Logon of the IACBOX | |||
Only available with the logon type to
| Configuration Key | Since | Mandatory | Default |
|---|---|---|---|
| otc | 17.0 | No | 3600 |
| Time credit in seconds | |||
| otl | 17.0 | No | 17 |
| Ticket limit in MB | |||
| omi | 17.0 | No | 500 |
| Max idle timeout in seconds | |||
| oep | 17.0 | No | 10800 |
| Expiration period in seconds | |||
| odl | 17.0 | No | 2048 |
| Max download bandwidth in kBit/s (max value is the total bandwith under System/Network) | |||
| oul | 17.0 | No | 1024 |
| Max upload bandwidth in kBit/s (max value is the total bandwith under System/Network) | |||
| ode | 17.0 | No | LoginApi Free Plugin take online |
| Ticket description | |||
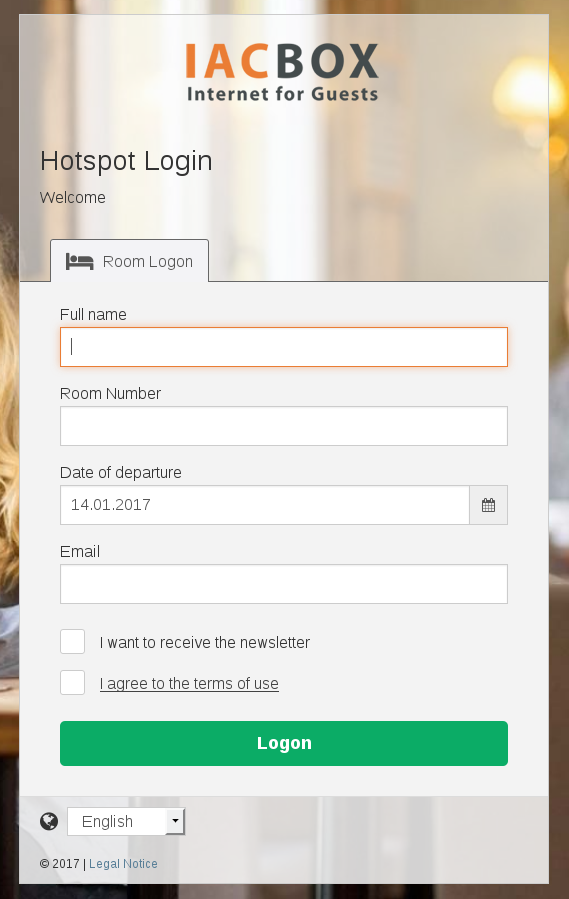
PMS
The PMS plugin works the same way as it does on the IACBOX landing page. After the successful authentication you get to a second page to select a ticket.
New in version 17.0: We also support the PMS Himed, Guestline and ASAj.
Attention
- The following configuration keys have to be in sync with your PMS configuration in Modules/Interfaces/PMS:
- auth-fields
- name-check
| Configuration Key | Since | Mandatory | Default |
|---|---|---|---|
| pms-icon | 2.0 | Yes | fa fa-hotel |
| Sets the icon for the plugin | |||
| auth-fields | 2.0 | Yes | room, name |
| The fields which are needed for the authentication | |||
| name-check | 17.0 | No | full |
| Changes the label of the name field | |||
| show-email | 2.0 | No | false |
| Shows an email field (create a custom service to further work with the information) | |||
| email-syntax-check | 2.0 | No | true |
| Set if the email-adress should be checked for a correct syntax | |||
| email-mandatory | 2.0 | No | false |
| Set if the email-field is mandatory | |||
| show-building-selection | 2.0 | No | false |
| Enables the number padding and building mapping | |||
| room-nr-padding | 2.0 | No | 0 |
| Number of digits which has to met in the roomnumber | |||
| room-nr-type | 2.0 | No | number |
| Room number only contains digits or is alphanumeric | |||
| building-mapping | 2.0 | No | |
| Specific Mapping for the room number e.g.: A:Aaaaaaa;B:Bbbbbbb;C:Ccccccc | |||
| show-address-person | 2.0 | No | false |
| Enables the field how to address a person e.g. Mr. or Mrs. | |||
| address-person-mapping | 2.0 | No | |
| Specific mapping for address of a person | |||
Guestline
The Guestline plugin is only available in the LoginAPI and is not supported of the default Logon page.
New in version 18.0.
Attention
Plugin can not be used in external mode
Attention
PMS module needs to be licensed to use this plugin
| Configuration Key | Since | Mandatory | Default |
|---|---|---|---|
| guestline-icon | 18.0 | Yes | fa fa-hotel |
| Sets the icon for the plugin | |||
| guestline-operator-code | 18.0 | Yes | |
| Sets the operator code of the Guestline Endpoint | |||
| guestline-pwd | 18.0 | Yes | |
| Sets the password of the Guestline Endpoint | |||
| guestline-site-id | 18.0 | Yes | |
| Sets the site id of the Guestline Endpoint | |||
| guestline-interface-id | 18.0 | Yes | |
| Sets the interface id of the Guestline endpoint | |||
| guestline-endpoint | 18.0 | Yes | |
| Sets the endpoint url of Guestline | |||
| auth-fields | 18.0 | Yes | room, name, departure_date |
| The fields which are needed for the authentication | |||
| exact-match | 18.0 | No | 2 |
| Sets the matching accuracy of the name (0 exact, 5 inaccurate) | |||
| show-ticket-selection | 18.0 | No | true |
| Sets if a ticket selection should be available | |||
| allow-multi-guest-login* | 18.0 | No | true |
| Changes the label of the name field | |||
| show-email | 2.0 | No | false |
| Shows an email field (create a custom service to further work with the information) | |||
| email-syntax-check | 2.0 | No | true |
| Set if the email-adress should be checked for a correct syntax | |||
| email-mandatory | 2.0 | No | false |
| Set if the email-field is mandatory | |||
| show-building-selection | 2.0 | No | false |
| Enables the number padding and building mapping | |||
| room-nr-padding | 2.0 | No | 0 |
| Number of digits which has to met in the roomnumber | |||
| room-nr-type | 2.0 | No | number |
| Room number only contains digits or is alphanumeric | |||
| building-mapping | 2.0 | No | |
| Specific Mapping for the room number e.g.: A:Aaaaaaa;B:Bbbbbbb;C:Ccccccc | |||
| show-address-person | 2.0 | No | false |
| Enables the field how to address a person e.g. Mr. or Mrs. | |||
| address-person-mapping | 2.0 | No | |
| Specific mapping for address of a person | |||
Himed
The Himed plugin works exactly as the PMS Plugin and also has the same configuration keys. Additional it is possible to define a redirect url because Himed allows a flexible redirect url.
Hint
- The following placeholder are available:
- $USERID = UserId of the Himed client
| Configuration Key | Since | Mandatory | Default |
|---|---|---|---|
| Same configuration values as the PMS Plugin | |||
| himed-redirect-url | 17.0 | No | |
| Redirect URL after Himed authentication | |||
Email
The email plugin is linked with the messaging module Email. Therefore the ticket template will be used which is configured in the email settings (Modules -> Interfaces -> Email).
If you want to use the pwdonly login with the email plugin follow the hint.
Hint
- The password login has to be activated on the IACBOX.
- The password login has to be enabled in a ticket template.
- For further information see our documentation for the Password Login
New in version 2.0.
| Configuration Key | Since | Mandatory | Default |
|---|---|---|---|
| email-icon | 2.0 | Yes | fa fa-envelope |
| Sets the icon for the plugin | |||
| pwd-only | 2.0 | Yes | false |
| Set to true if you are using a pwd-only template | |||
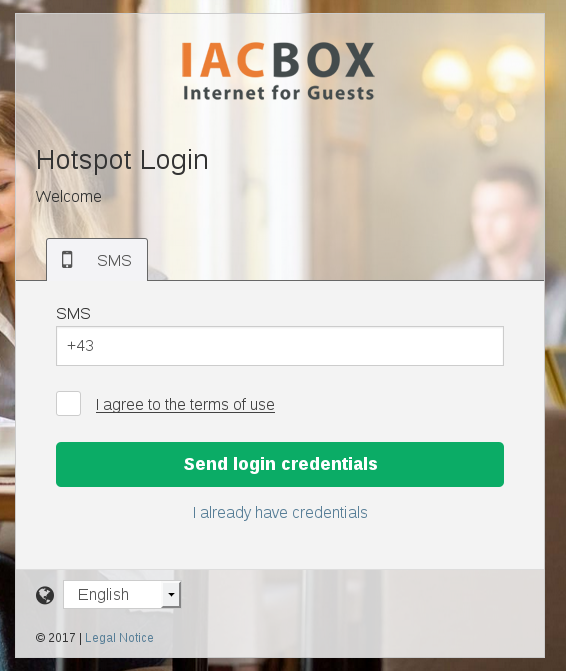
SMS
The SMS plugin sends credentials to the given phone number via the configured SMS backend. This has to be configured on Modules -> Interfaces -> SMS.
If you want to use the pwdonly login with the sms plugin follow the hint.
Hint
- The password login has to be activated on the IACBOX.
- The password login has to be enabled in a ticket template.
- For further information see our documentation for the Password Login
New in version 17.0.
| Configuration Key | Since | Mandatory | Default |
|---|---|---|---|
| sms-icon | 17.0 | Yes | fa fa-mobile |
| Sets the icon for the plugin | |||
| pwd-only | 17.0 | Yes | false |
| Set to true if you are using a pwd-only template | |||
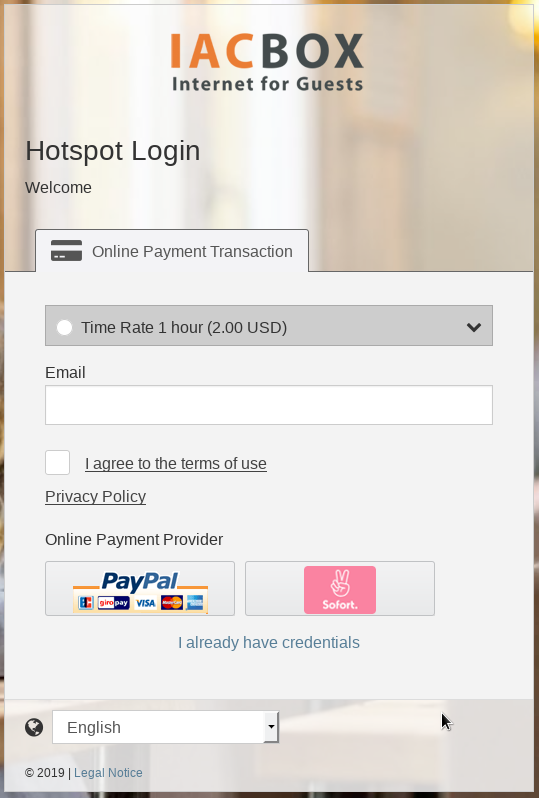
Payment
This plugin allows you to login via a payed ticket. Currently we support the following two payment providers PayPal and Sofort Überweisung.
If you want to use the configuration value send-email configure the WebAdmin setting in the menu Settings/Network/SMTP Proxy.
Attention
- We are providing some experimental payment providers:
- Stripe
- WorldPay
- 2Checkout
- AuthorizeNet
They are implemented in the code but no buttons are provided for their usage. You have to implement them yourself.
| Configuration Key | Since | Mandatory | Default |
|---|---|---|---|
| payment-icon | 2.0 | Yes | fa fa-credit-card-alt |
| Sets the icon for the plugin | |||
| enabled-services | 2.0 | Yes | |
| Enable which service should be possible for a client | |||
| append-location-id | 2.0 | Yes | |
| Location id will be send to the payment provider | |||
| test-mode | 2.0 | Yes | false |
| Set the sandbox mode for the payment provider | |||
| send-email | 2.0 | Yes | |
| Email with login data will be send appends a email field | |||
| currency | 2.0 | Yes | |
| Set the currency (has to be in sync with the IACBOX) | |||
| paypal-username | 2.0 | Yes | |
| Set the username for Paypal | |||
| paypal-password | 2.0 | Yes | |
| Set the password for Paypal | |||
| paypal-signature | 2.0 | Yes | |
| Set the Paypal signature | |||
| sofort-account-id | 2.0 | Yes | |
| Set the account id for SofortÜberweisung | |||
| sofort-key | 2.0 | Yes | |
| Set the key for SofortÜberweisung | |||
| sofort-project-id | 2.0 | Yes | |
| Set the project id for SofortÜberweisung | |||
Experimental payment provider which are not tested
| Configuration Key | Since | Mandatory | Default |
|---|---|---|---|
| stripe-key | 2.0 | Yes | |
| Set the key for Stripe | |||
| worldpay-installation-id | 2.0 | Yes | |
| Set the installation id for WorldPay | |||
| worldpay-account-id | 2.0 | Yes | |
| Set the account id for WorldPay | |||
| worldpay-secret-word | 2.0 | Yes | |
| Set the secret word for WorldPay | |||
| twocheckout-number | 2.0 | Yes | |
| Set the number for 2Checkout | |||
| twocheckout-secret | 2.0 | Yes | |
| Set the secret for 2Checkout | |||
| authorize-net-id | 2.0 | Yes | |
| Set the id for Authorize.Net | |||
| ode | 2.0 | No | |
| Ticket description | |||
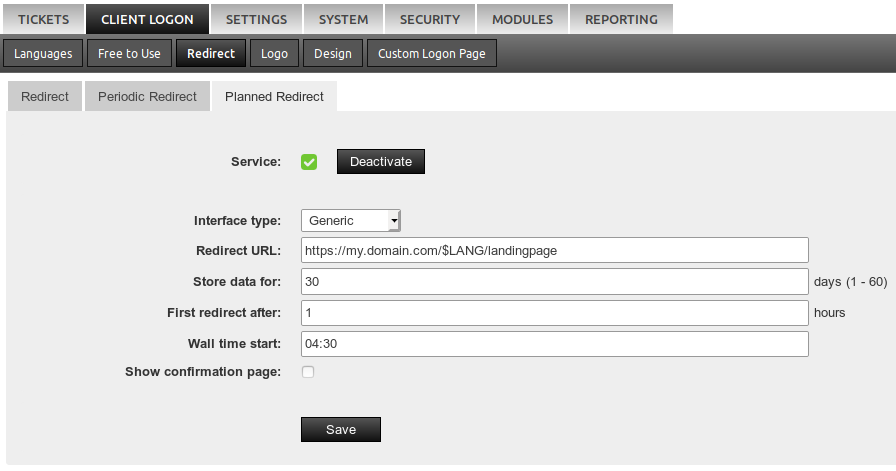
Planned redirect / ReviewPro
To activate this plugin, add plannedredirect to the plugin setting in main.config - this is done automatically for the local LoginAPI.
plugins = <any other plugin>, plannedredirect, status
This plugin takes a client offline in the night and redirects it to an arbitrary page when the device is activated in the morning again.
- There are two main types supported:
- ReviewPro: This redirects to an in-stay survey of ReviewPro
- Generic: This redirects to an arbitrary website
The concept is to take a client offline in the night, as devices don’t behave in a user friendly way when disconnected while they are used. If the device gets disconnected in the night (default 04:00) where most users are sleeping a new DHCP request including a connection check is done when the device is activated again. Taking the client offline is needed to be able to do a redirect as most connections are encrypted nowadays and only the connection check is done with an unencrypted HTTP call.
For example: a guest checks in on Monday 3pm - after 48h (Wednesday 3pm) in the following night (Thursday 4am) the client gets disconnected and redirected to the survey when the device gets activated again. Set the timeout to 24h if this should happen 1 day earlier.
ReviewPro
Hint
- There is only one redirect per stay, so nobody gets annoyed and the hotel gets quality feedback.
- A guest does not have to re-authenticate again after the “Back to internet” button was pressed.
The idea is to get valuable feedback during the stay of a guest. After the set time interval (default 48h) in the following night the client is taken offline to be able to redirect the device.
We strongly recommend to activate the confirmation page which asks the guest if s/he wants to do the survey. Without the confirmation page the quality of the feedback will suffer as many guests just want to get online again and would give any feedback just to achieve this.
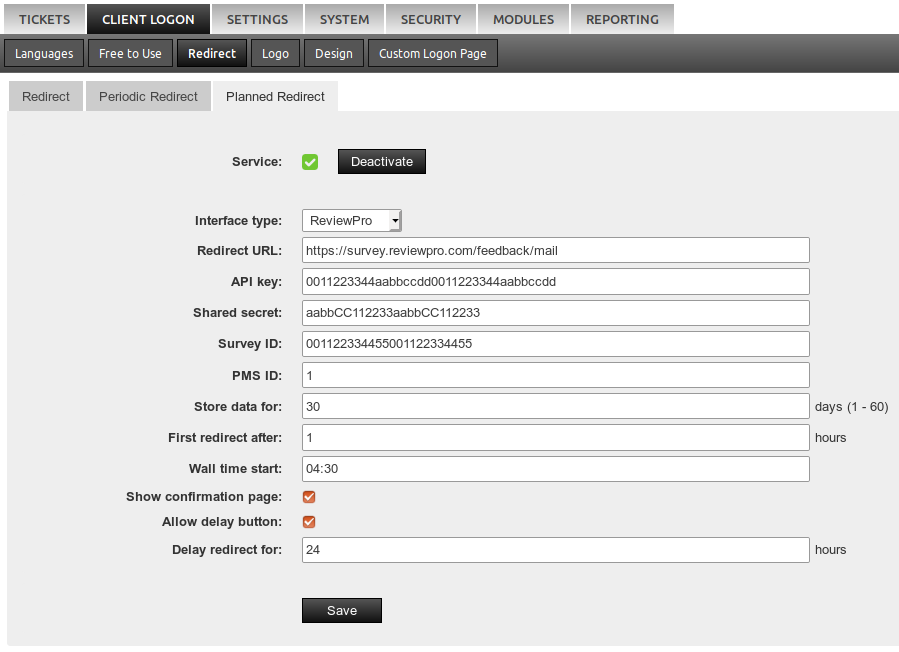
Configuration values
| Configuration | Mandatory | Default | Description |
|---|---|---|---|
| Redirect URL | Yes | Use the default URL unless instructed otherwise | |
| API key | Yes | ReviewPro provides this API key | |
| Shared Secret | Yes | ReviewPro provides the shared secret | |
| Survey ID | Yes | ReviewPro provides you with this ID. It can be used for many locations that should show the same survey | |
| PMS ID | Yes | The ID of your PMS used to differentiate all hotels that show the same survey | |
| Store data for | Yes | 30 | Number of days the IACBOX stores which devices have already done the survey |
| First redirect after | Yes | 48 | After how many hours the first redirect should be done in the following night |
| Wall time start | Yes | 04:00 | Daytime at which the devices should get disconnected |
| Show confirmation page | No | False | If the guest should get asked if s/he wants to do the survey (recommended) |
| Allow delay button | No | False | If an additional delay button should be shown |
| Delay redirect for | No | 24 | How many hours until the confirmation page is shown again |
Generic
- Supported placeholders in the URL are.
- $LANG = The detected language of the client as two-letter ISO code like (en, de, it, …). Any unknown language (to the LoginAPI) will result in the fallback language from
main.conf. - $IP = IP address of the client
- $MAC = MAC address of the client
- $VLAN = The VLAN/route ID
- $LOCID = The location ID - depending on the setting this is the VLAN/route ID and/or the registration number
- $LANG = The detected language of the client as two-letter ISO code like (en, de, it, …). Any unknown language (to the LoginAPI) will result in the fallback language from
Hint
It’s important to have a prominent Back to internet button on your website. This signals the IACBOX
DOKU integration
This manual describes how to configure the DOKU API on the IACBOX so guests can pay tickets using their credit card, and DOKU Wallet via DOKU payment gateway.
Hint
- DOKU is an indonesian payment gateway
- To use this API a DOKU Merchant account is required.
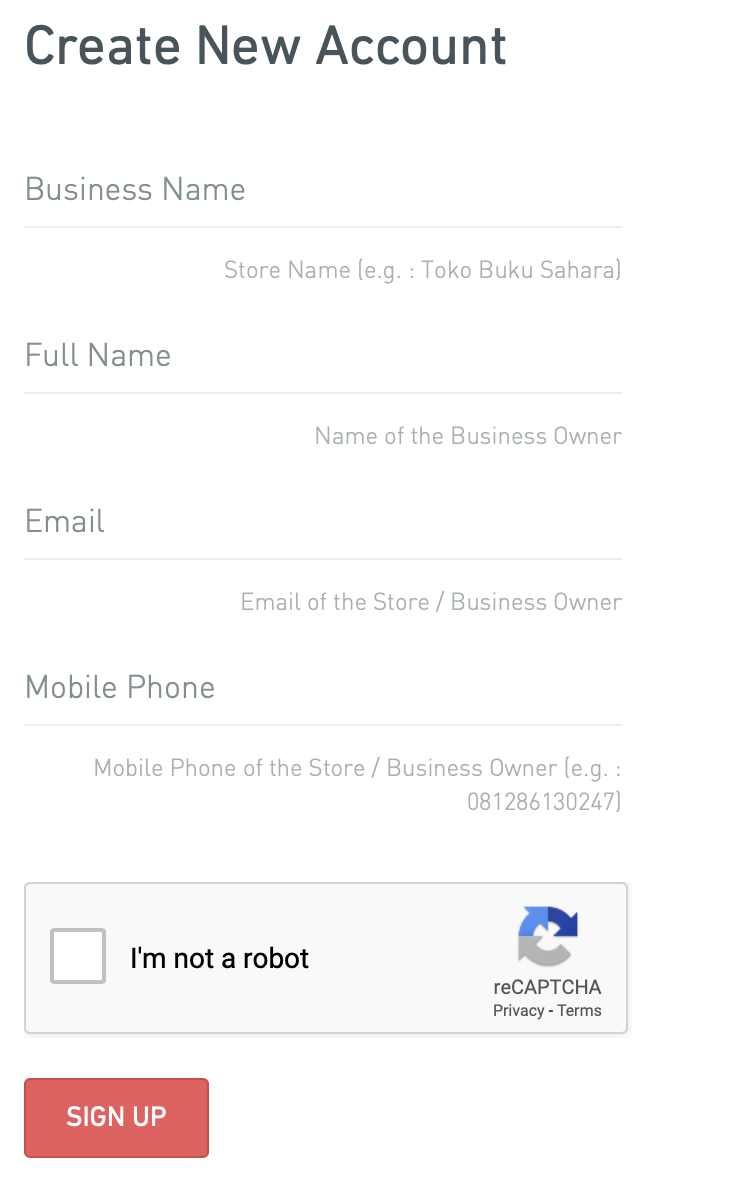
DOKU merchant account registration
To register new account, visit https://merchant.doku.com/acc/register fill out all fields and then hit the Sign Up button.
Upon successful registration, this screen will show up
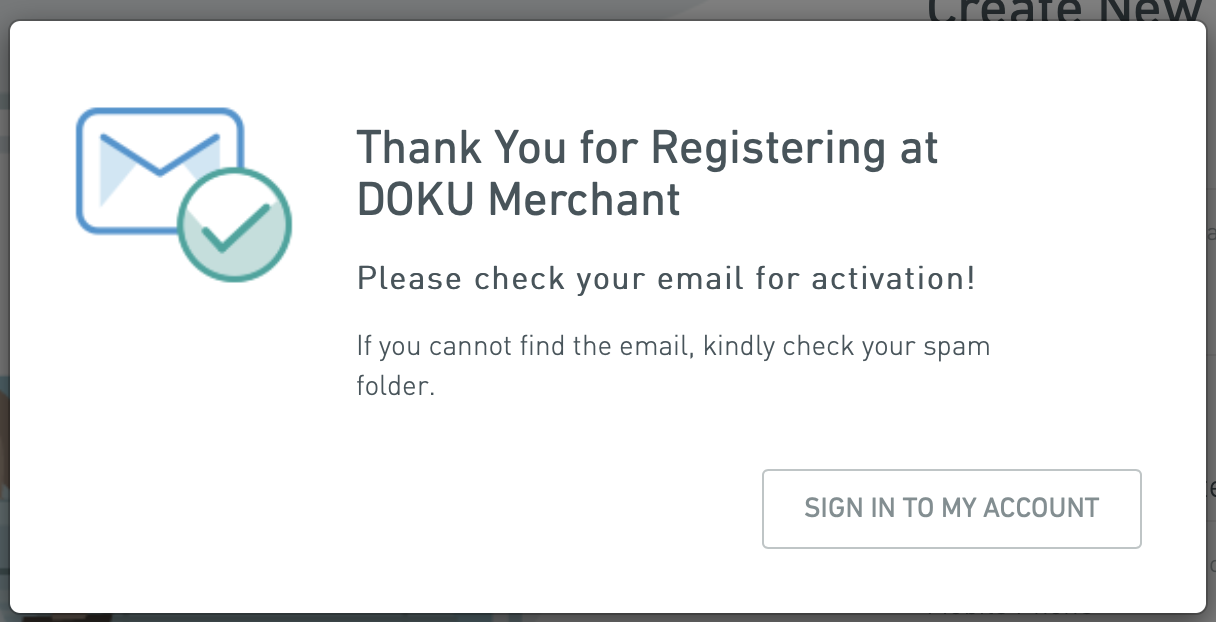
You can click at SIGN IN TO MY ACCOUNT but first, check your registered email to create a password for your account.
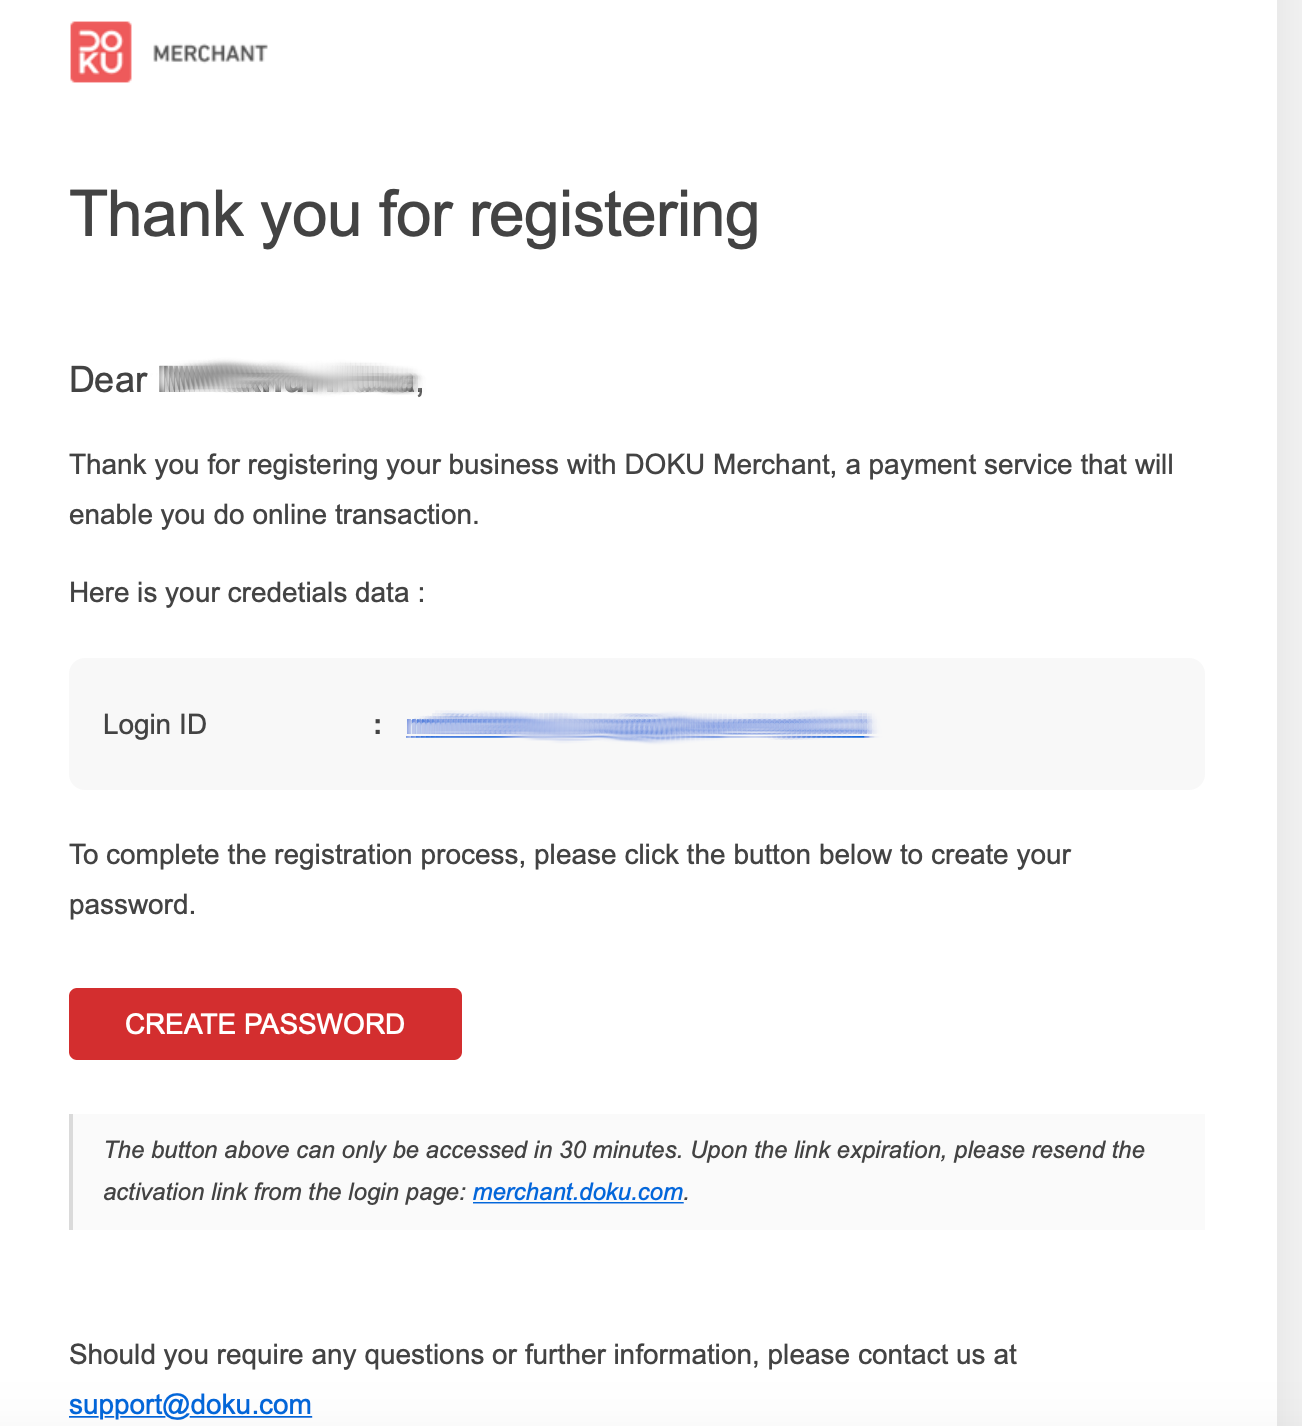
Click at that CREATE PASSWORD button, will take you to the next step.
Fill in your desired password.
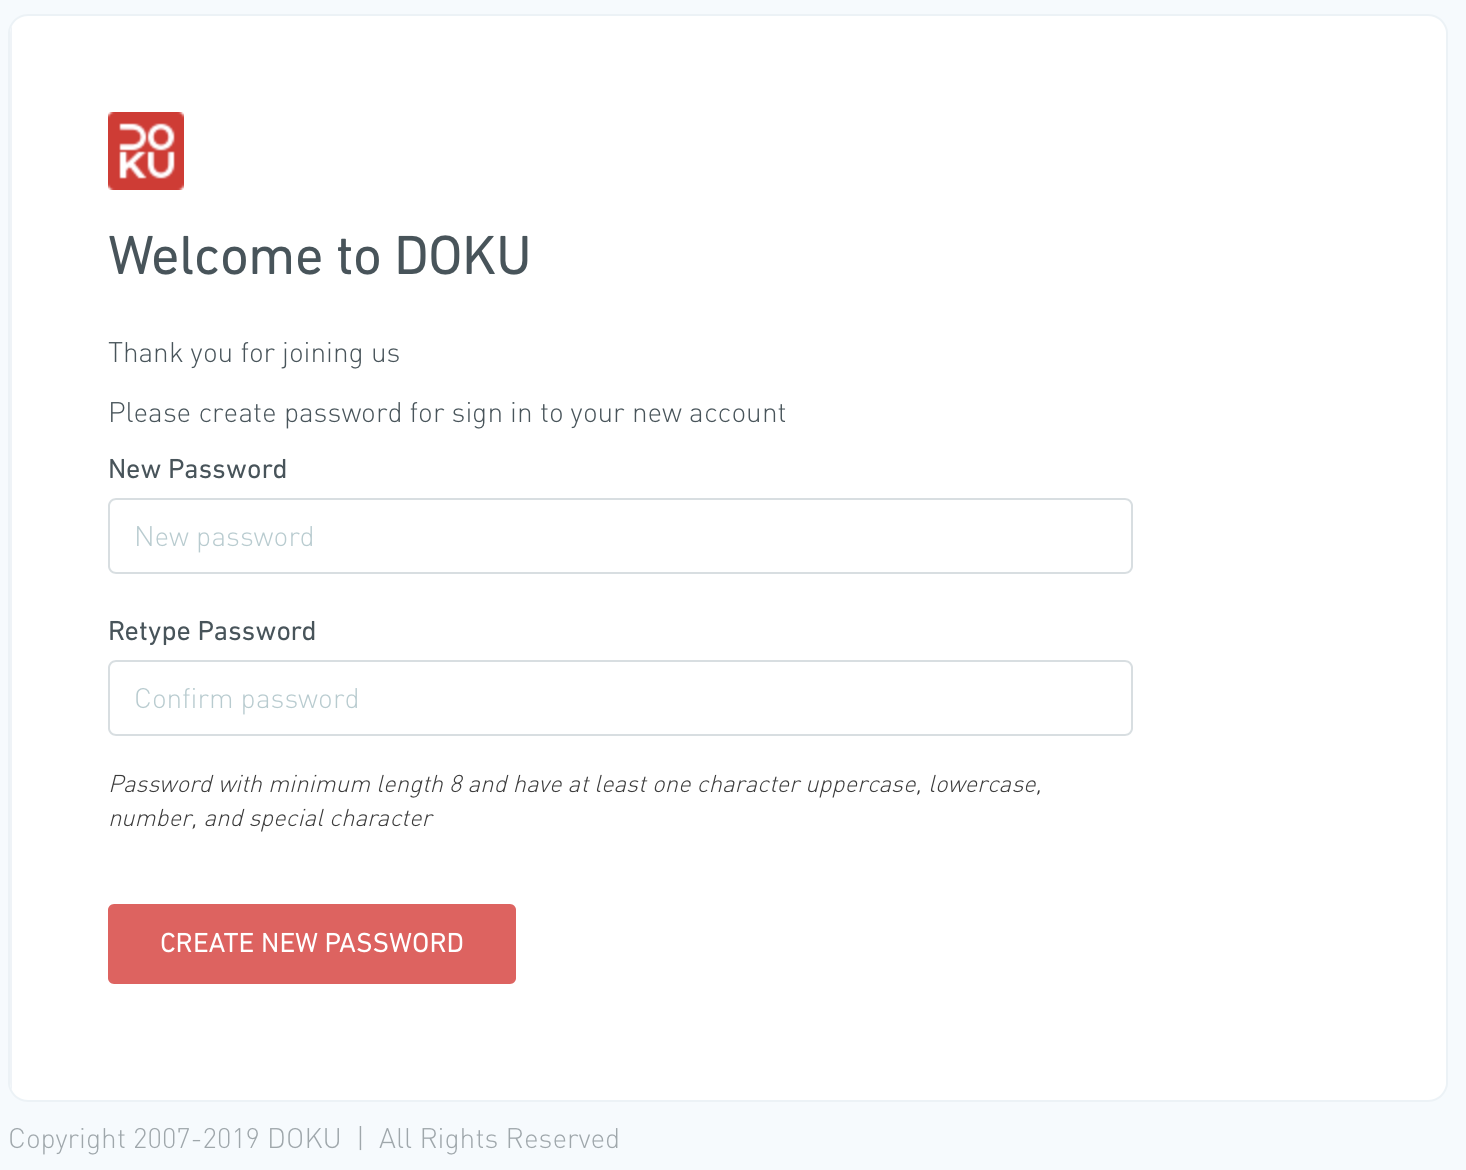
After successful password creation, you can now Sign-In.
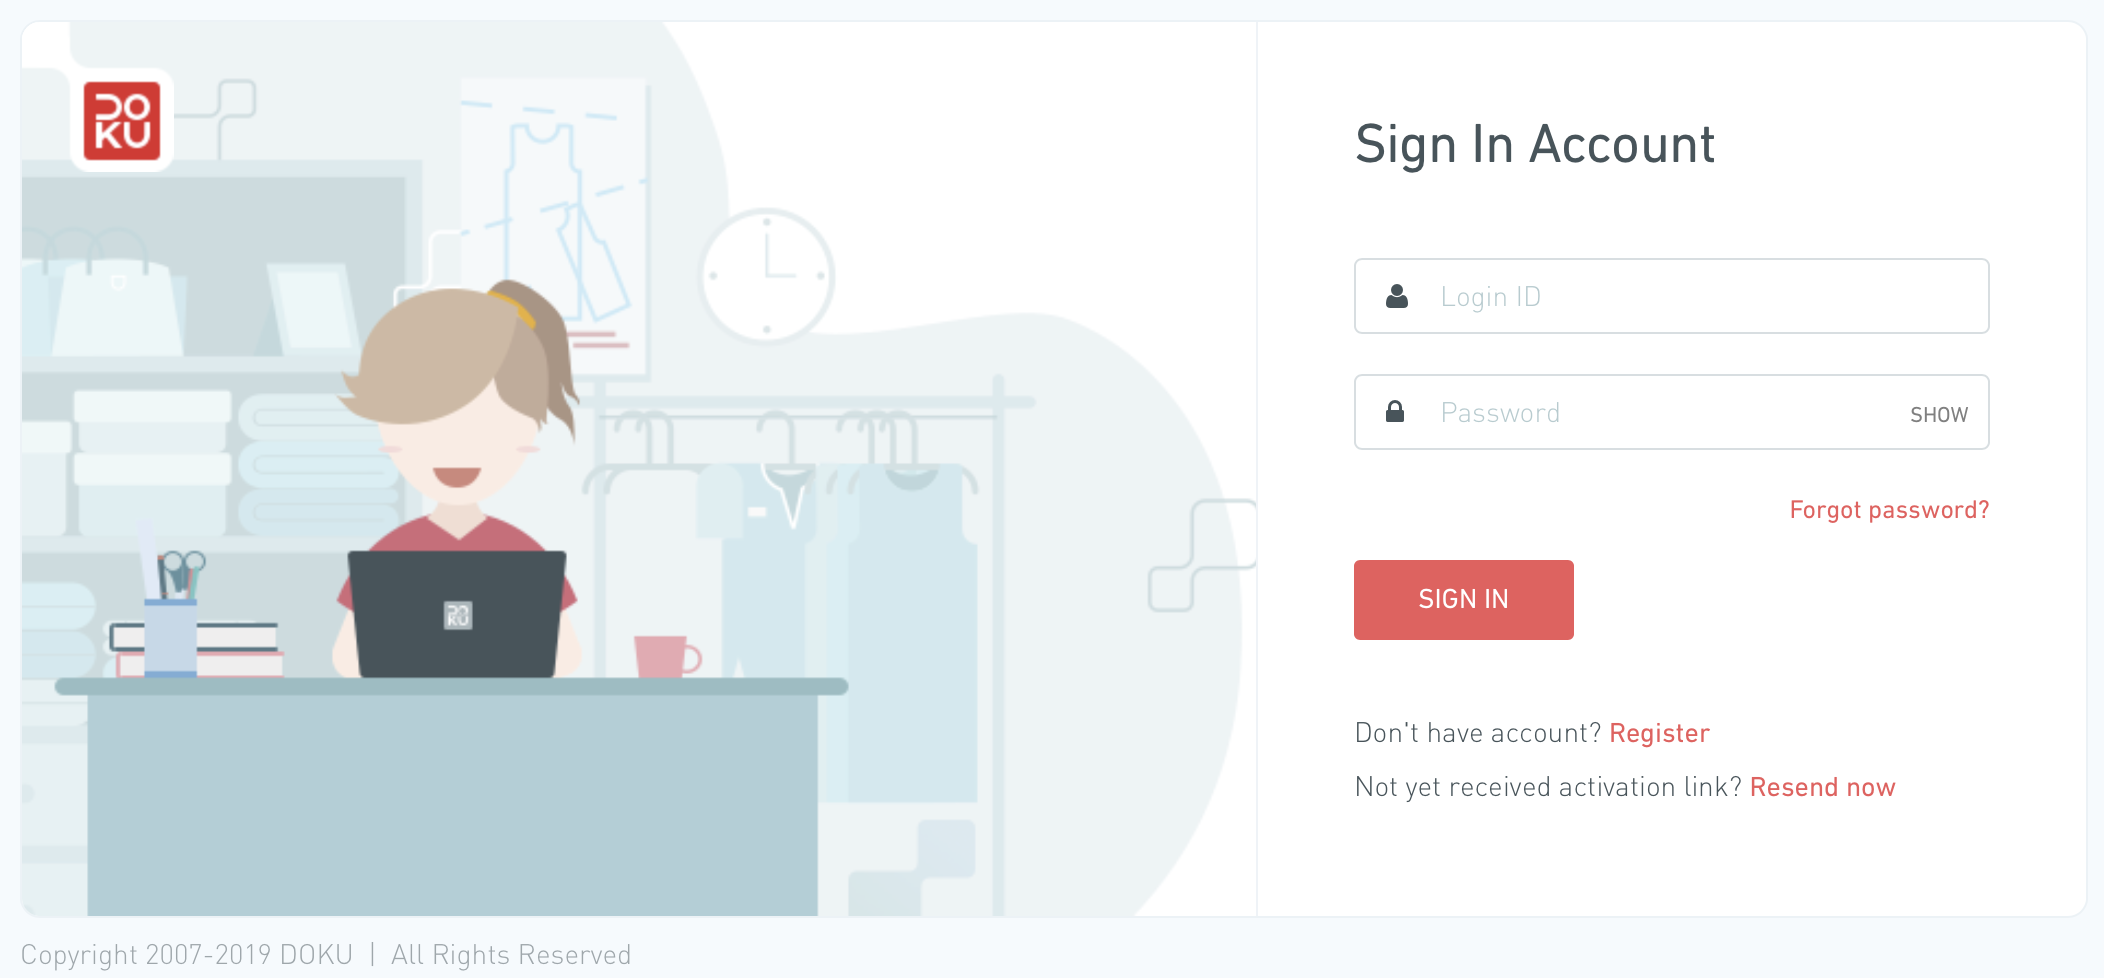
Now login with your registered email and password in this form.
After the first successful login, you will see this welcome message. Click on the GET STARTED button.

And after that please complete the business type data, and click on the SAVE AND NEXT button.
Please provide all necessary data and documents as required in the next steps.

Meeting all requirements above, and after your account has been activated by DOKU, you can now see your dashboard.
Go to Setting and then API Setting, to get information about Store ID and Shared Key, also fill in the necessary URLs.
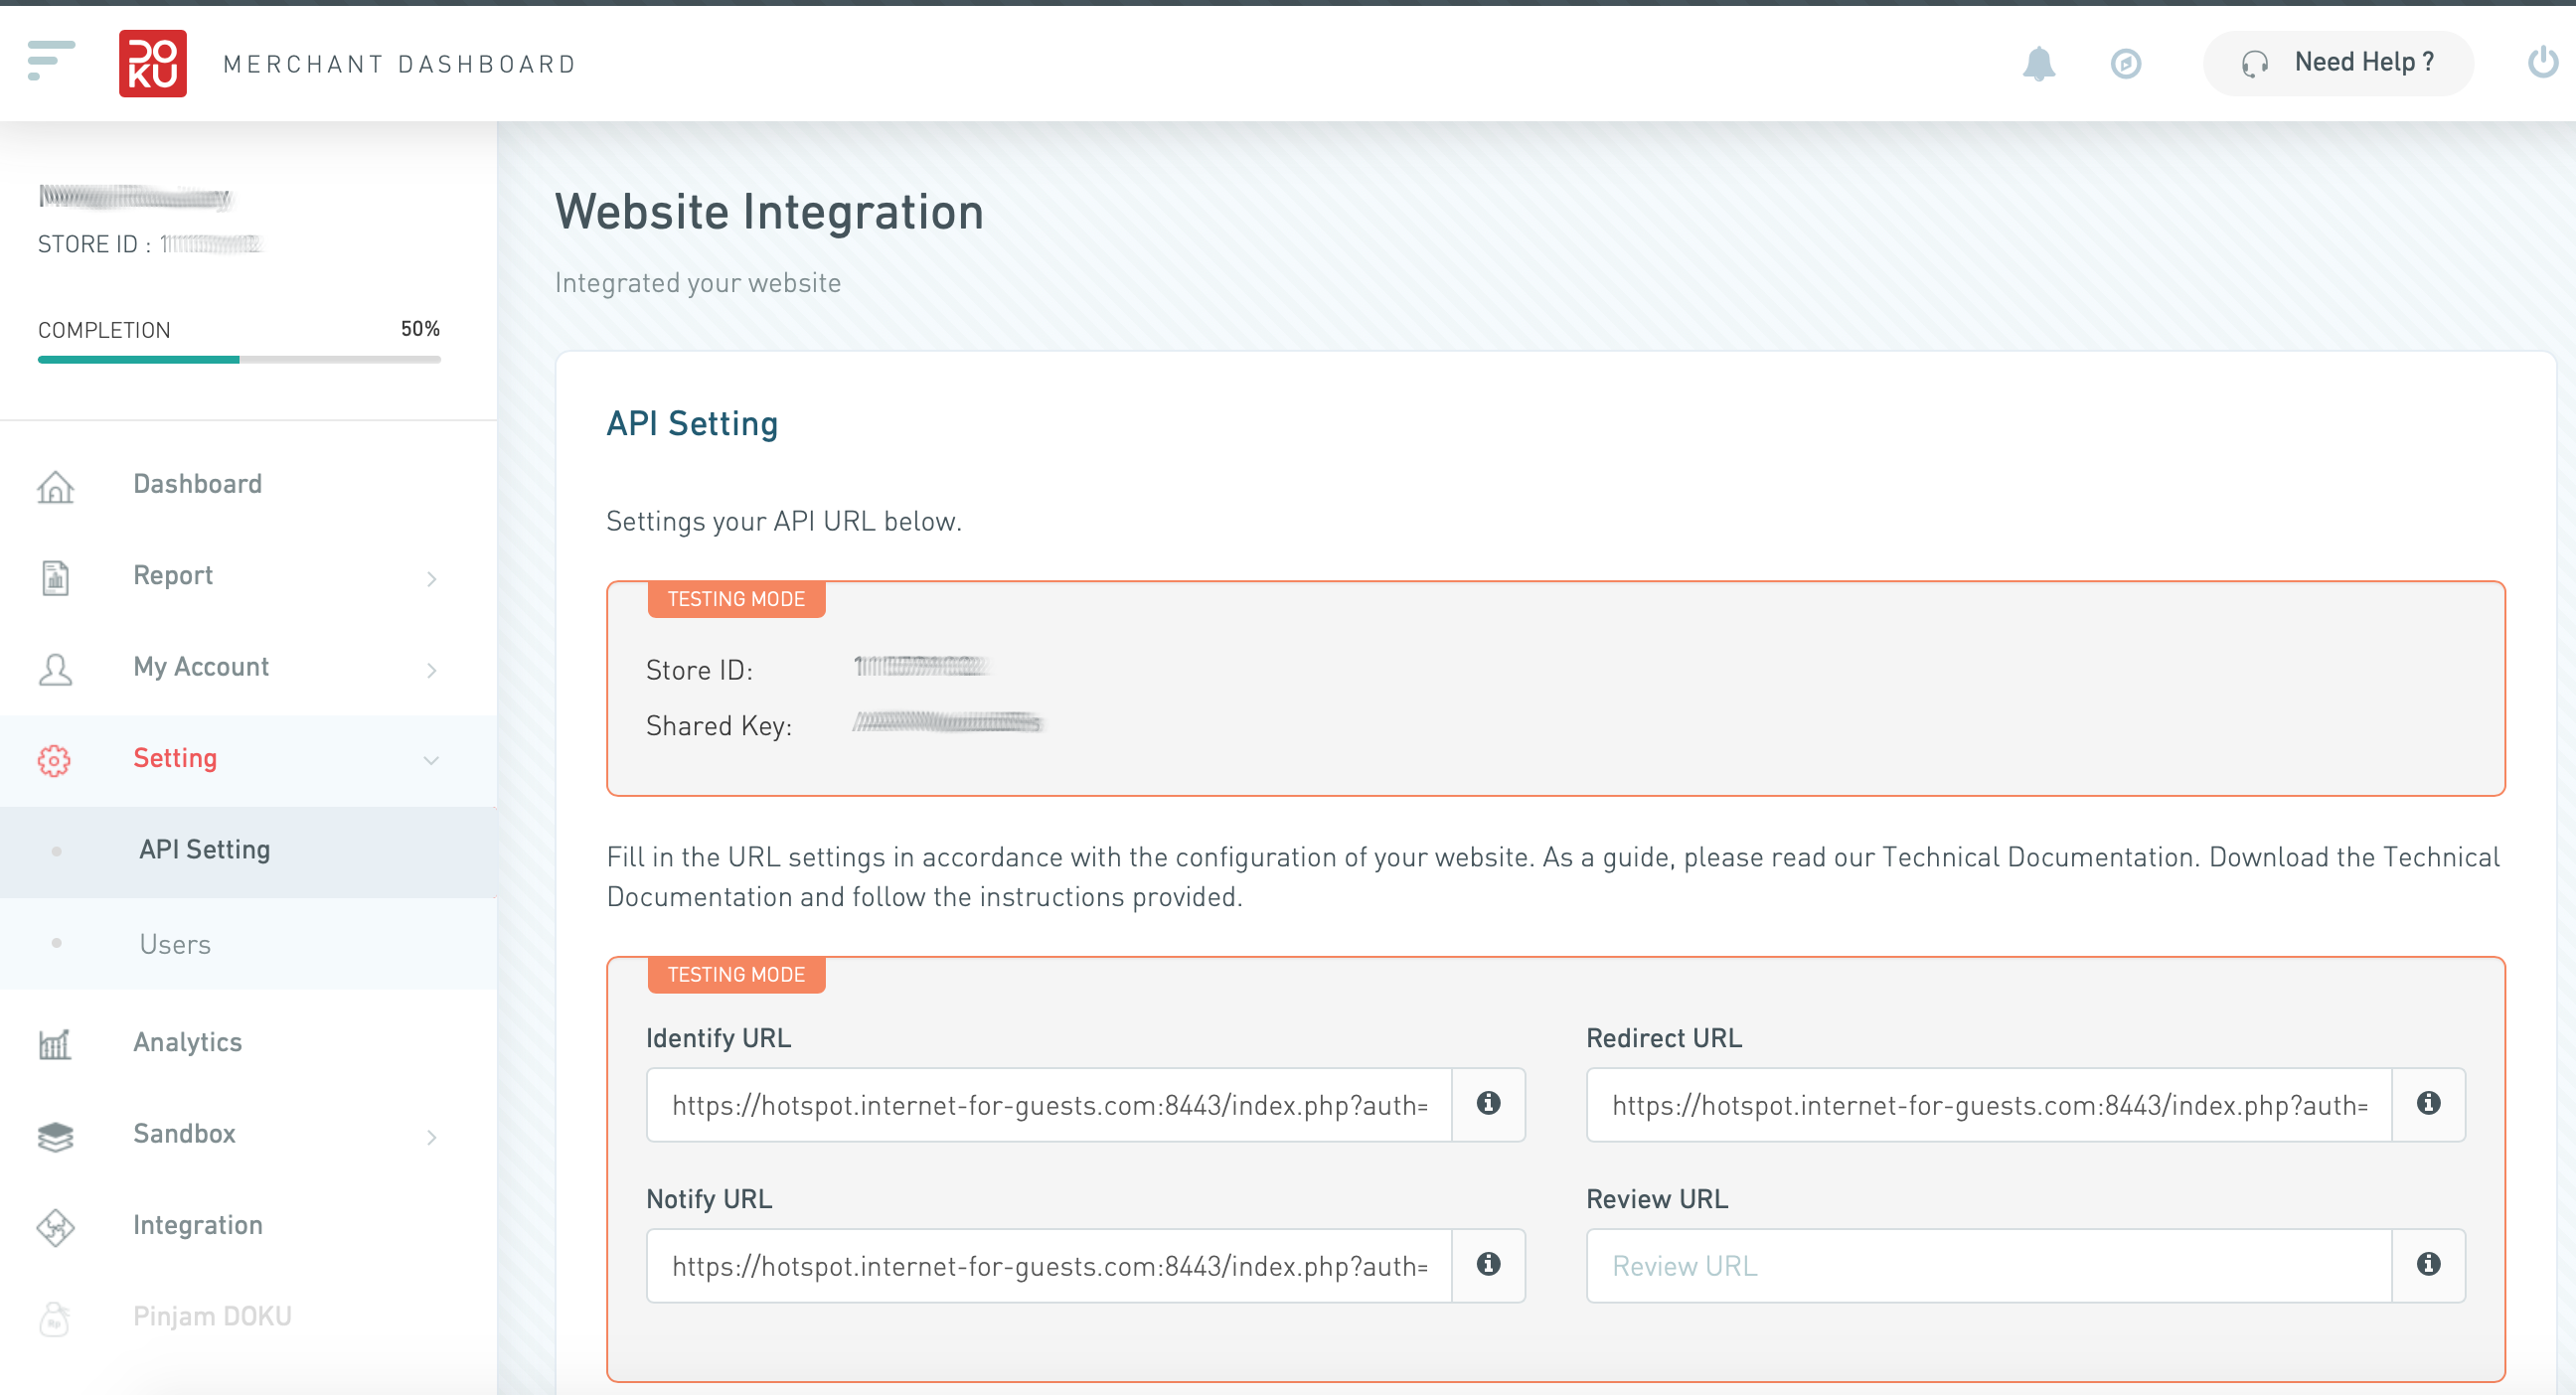
Here you get your Store ID and a Shared Key which has to be set in the IACBOX configuration.
Fill Identify URL, Notify URL, and Redirect URL according to your IACBOX domain configuration.
With our default domain this is https://hotspot.internet-for-guests.com:8443/index.php?auth=payment
If you have a custom domain use https://<your-domain-goes-here>:8443/index.php?auth=payment
Midtrans integration
This manual describes how to configure the Midtrans API on the IACBOX so guests can pay tickets via their credit card, and GoPay Balance via Midtrans payment gateway.
Hint
- DOKU is an indonesian payment gateway
- To use this API a Midtrans Passport Business account is required.
Midtrans passport account registration
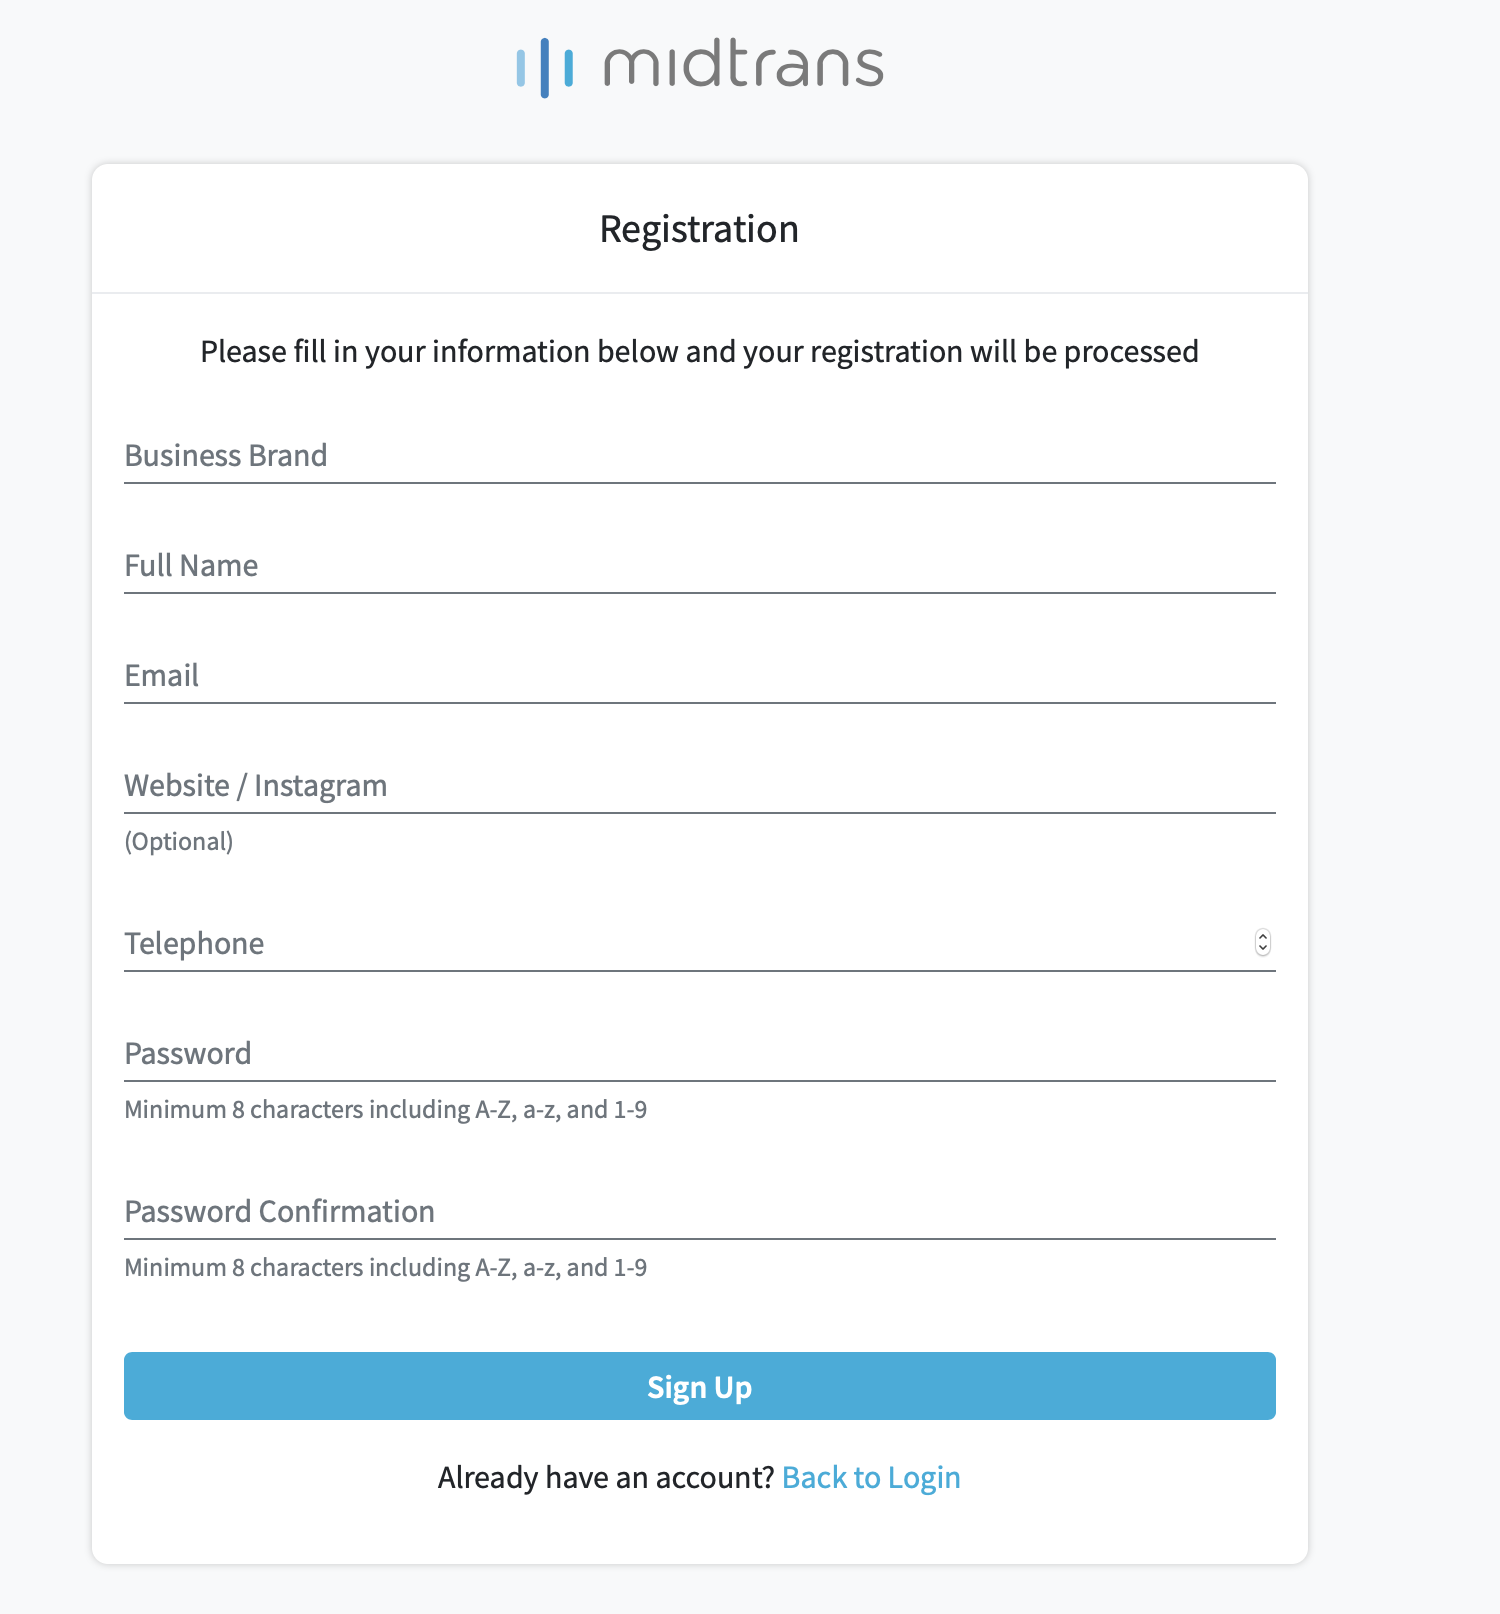
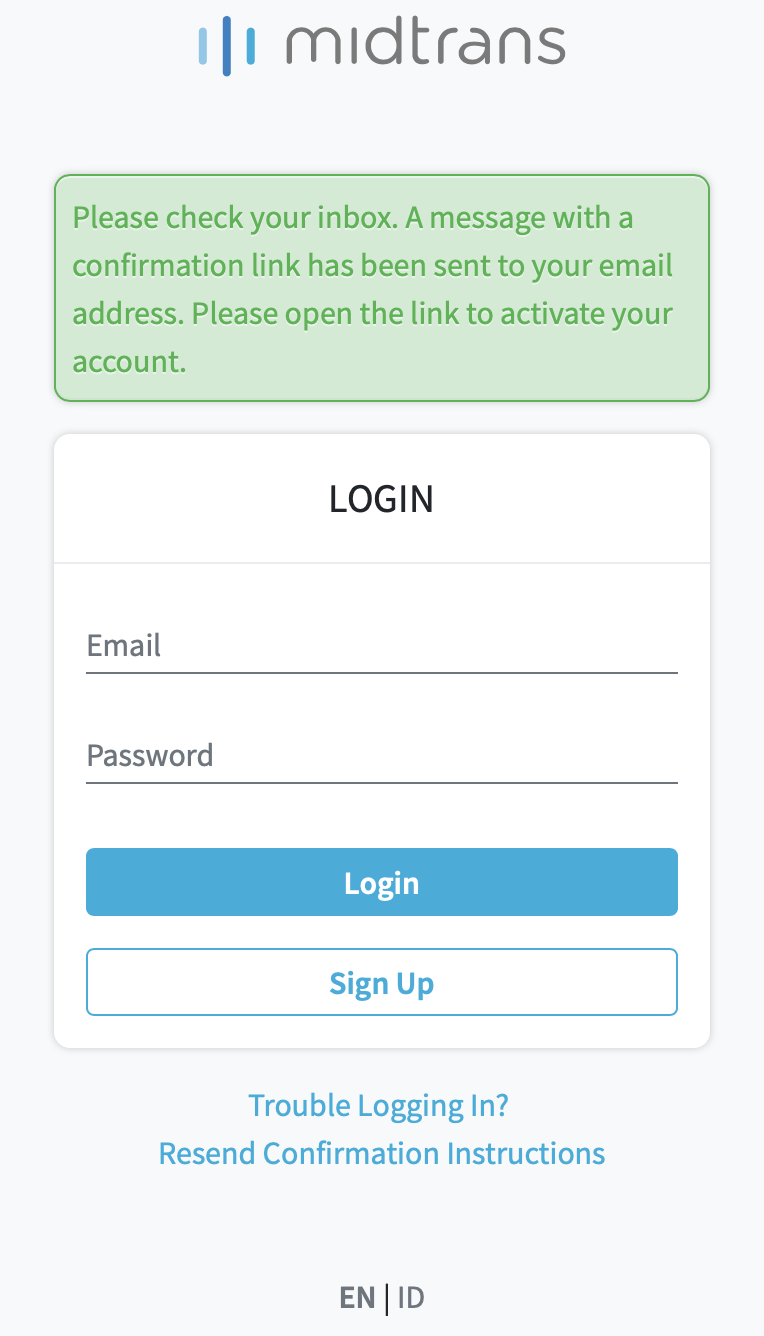
To register new account, visit https://account.midtrans.com/register fill out all fields and then hit the Sign Up button.
Upon successful completion this screen will show up
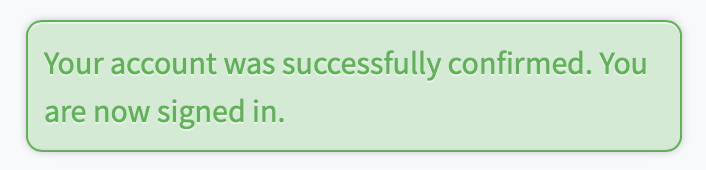
Check your registered email and click on Activate My Account button. This will activate your account, and opens a page like above, but with the following message
To login use the email and password of your account registration in order to see your dashboard. This process only activate account, and for doing integration you need to submit few documents in the dashboard.
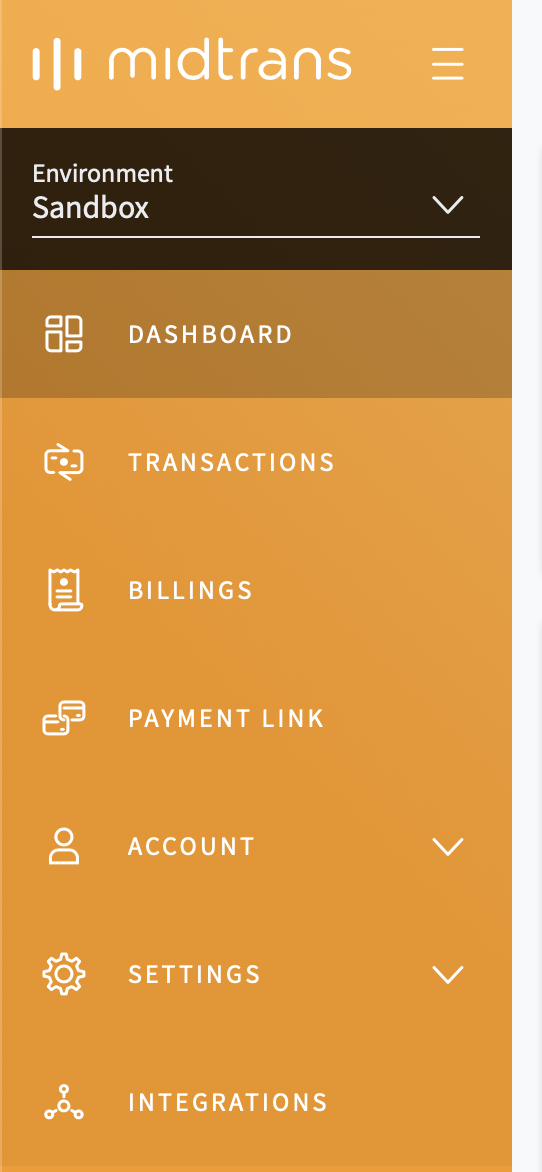
After the login process you will be presented Sandbox Environment, because the documents is still not completed yet. The Sandbox menu will looks like this one on the left side of the page
To complete the registration process and activate the integration, please change Environment to Production.
Follow the link to complete the registration. Here you can choose your Corporate in Business Type
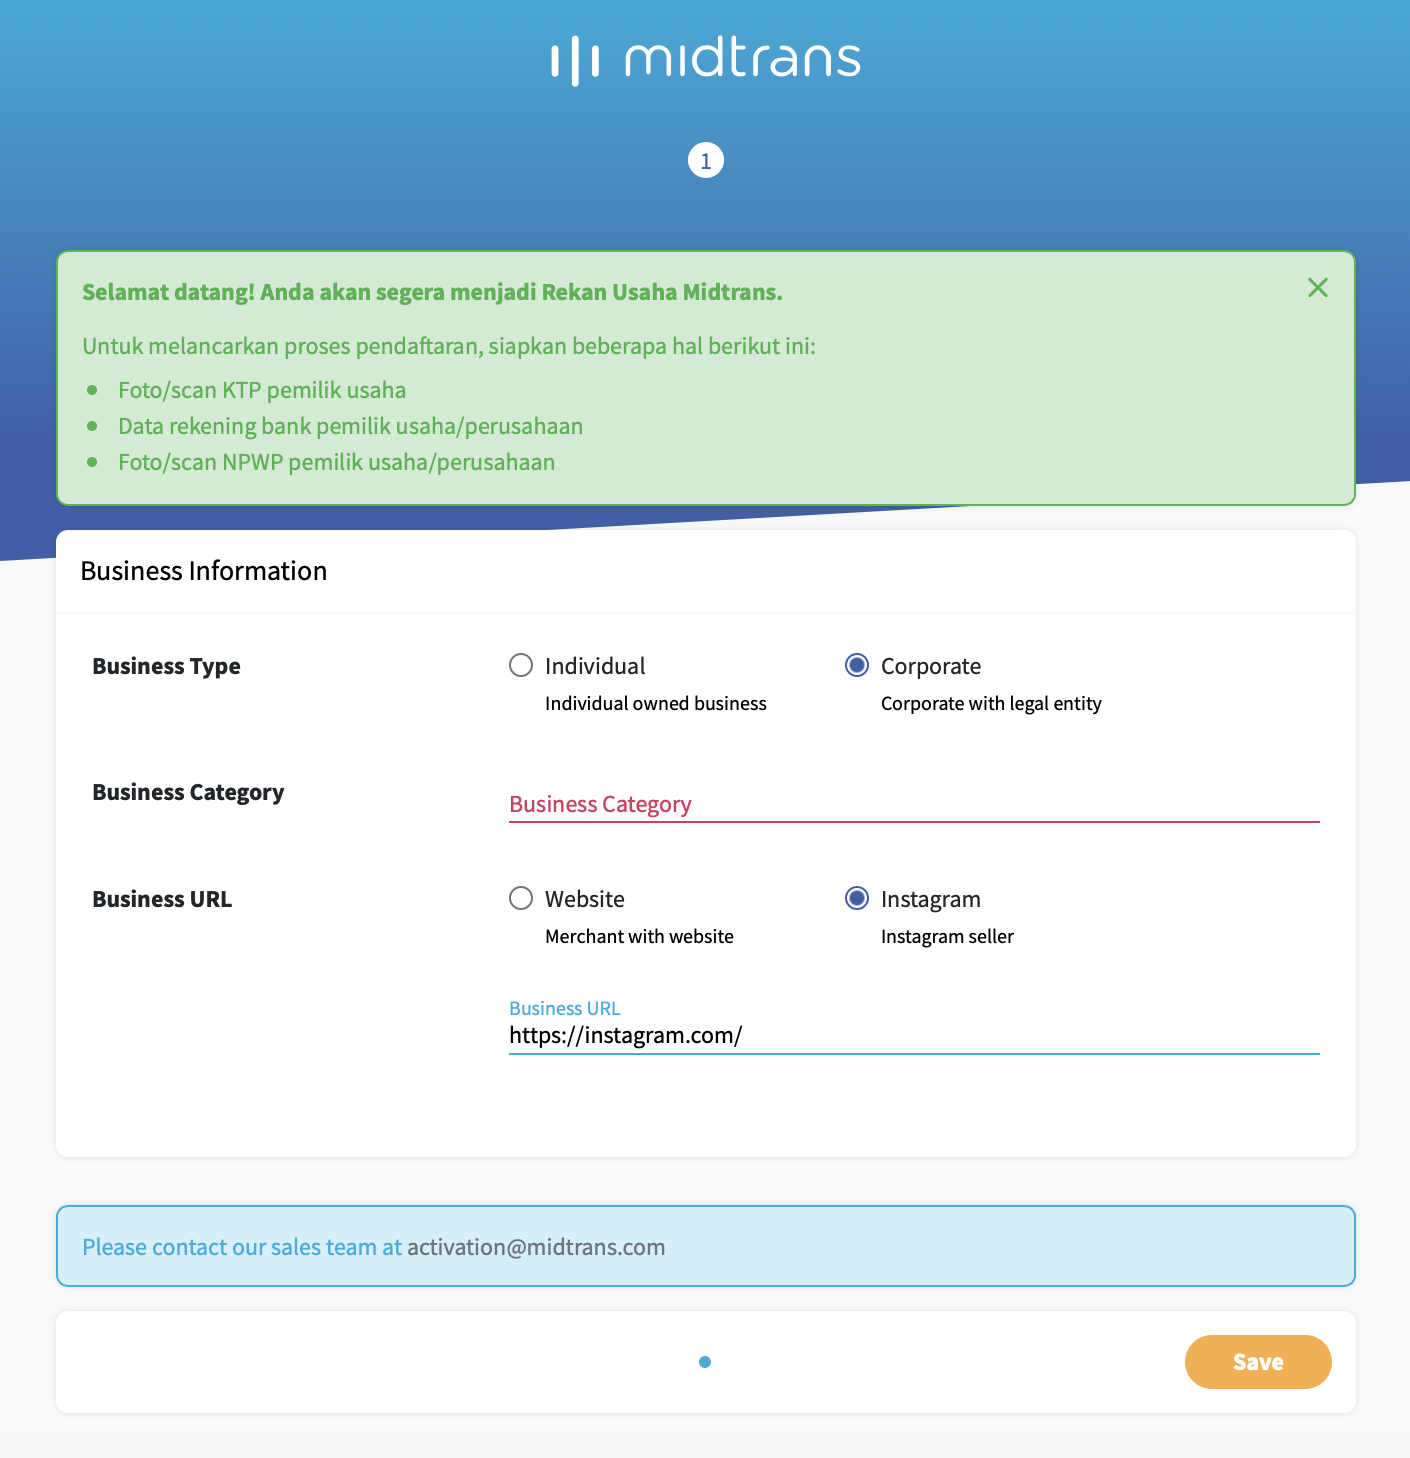
After saving this form, you can contact the sales team (activation@midtrans.com) for further instructions to activate your business account.
After account activation
Please get information about API Keys, that will be used in IACBOX configuration.
Login to your Dashboard, and then click on Settings (down arrow to the right of menu), and then choose Access Keys.
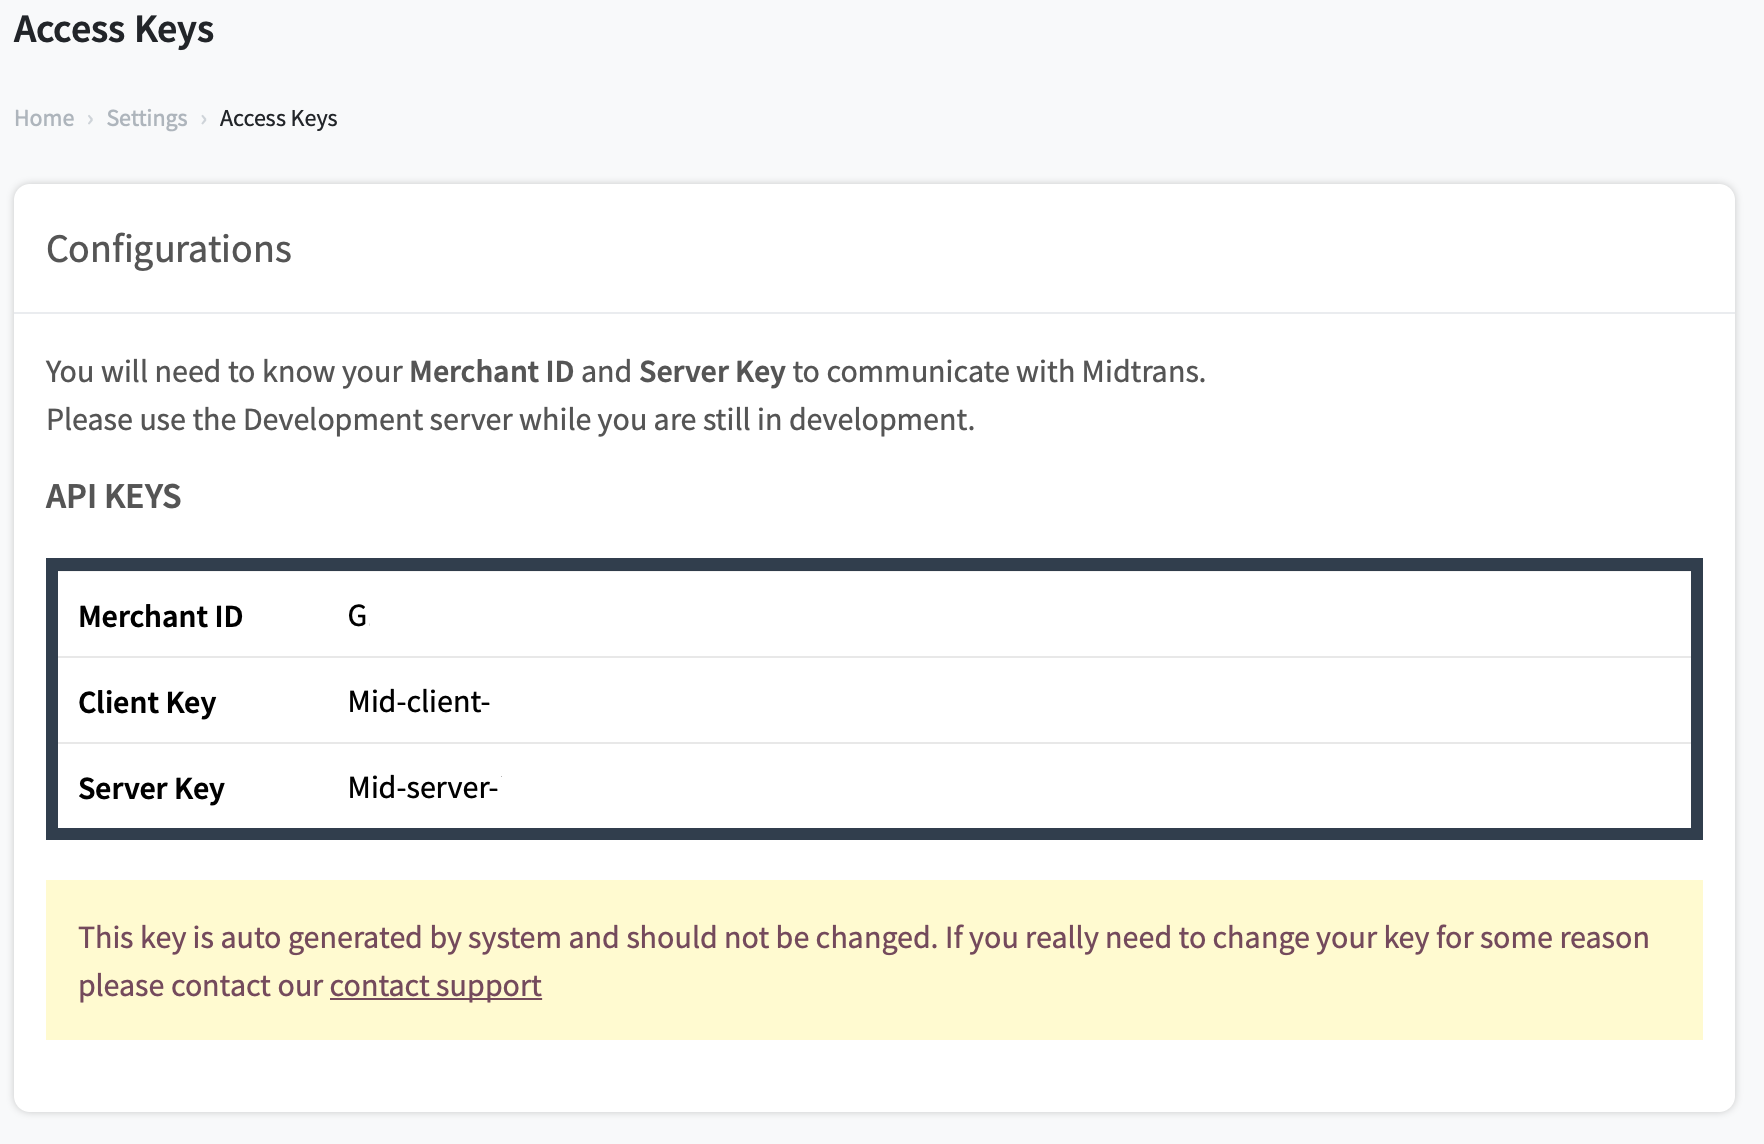
You can copy/paste this values to your IACBOX configuration.
Other plugins
Status
This plugin is the equivalent to the status pop-up on the default logon page and shows your current status.
The status will be displayed above the footer. Please note that no pop-up will be opened, so if you redirect the client after a successful login the status will not be visible to the user. A user can manually reach the login page with the following url: http://logon.now
Since version 17.2 the status can be refreshed via a icon
Ads
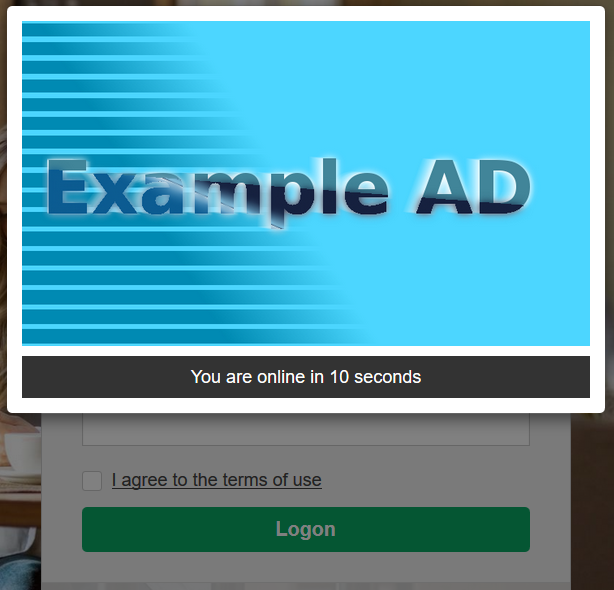
The Ads plugin allows you to show a modal popup on the landing page for a certain time. The user has to watch it until s/he can access the landing page.
| Configuration Key | Since | Mandatory | Default |
|---|---|---|---|
| display-time | 2.0 | Yes | |
| Seconds how long the popup should be shown | |||
| ads-type | 2.0 | Yes | |
| Type of the ad (image or video) | |||
| image-file | 2.0 | No | |
| Image file to be shown | |||
| video-file | 2.0 | No | |
| Video file to be shown | |||
| video-poster | 2.0 | No | |
| Poster image for the video | |||
Socialshare
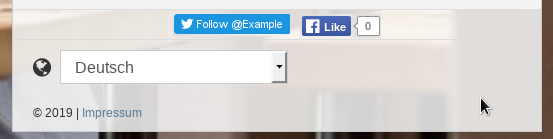
The socialshare plugin offers the possibility to like/share/follow a side. You can use the services of Twitter, Facebook and Google.
The plugin will be shown above the footer.
Attention
Google+ Like Button was removed because Google+ is deprecated with March 2019
| Configuration Key | Since | Mandatory | Default |
|---|---|---|---|
| enabled-services | 17.0 | Yes | |
| Enable which service should be possible for a client | |||
| twitter-name | 17.0 | Yes | |
| Name of the Twitter account which should be followed | |||
| twitter-show-screen-name | 17.0 | No | true |
| Show the name of the twitter account | |||
| twitter-show-count | 17.0 | No | false |
| Show the count of your twitter followers | |||
| fb-like-url | 17.0 | No | |
| Url to the page the user should like/ recommend | |||
| fb-action | 17.0 | Yes | like |
| You can choose between like or recommend | |||
| fb-layout | 17.0 | Yes | button |
| Choose the layout of your button | |||
| fb-data-show-faces | 17.0 | No | false |
| User should see the faces of friends who liked the page | |||
| fb-data-share | 17.0 | No | false |
| Add a share button to the like or recommend | |||
Social
The social plugin grants a user internet access via login through an external social platform. Currently supported platforms are facebook, twitter and google.
The plugin doesn’t have a connection to the module Social Login of the IACBOX and can therefore be used without further licensing.
Attention
You need to add the following parameters to your callback-url in the configuration of the app for a successful login: ?auth=social&hauth.done=<Provider> where provider is one of twitter or google depending on the used platform.
Attention
Since Facebook API-Version 2.10 dots . are not allowed in the redirect urls anymore. Pleasse modify the callback url to ?auth=social&hauth_done=Facebook.