Content Filter (legacy)
Attention
- The Content Filter has been replaced with the DNS Filter as of IACBOX Version 17.2 and will only remain as legacy option
- It is not suggested to use the Content Filter (legacy) and the DNS Filter at the same time - if in doubt then only use the DNS Filter
This manual describes how to configure and use the Content Filter (legacy).
Hint
- Out of the box, The Content Filter (legacy) can filter simple HTTP webpages, but not HTTPS
- Filter lists are being shared with the new DNS Filter, which does filter connection end-points and thus can also block HTTPS webpages
- In order to receive the newest and most recent Filter Lists, activate the Content Filter (legady) and hit Service Restart. From this point on, perform an Online Update in order to obtain the newest revision of filter lists
WebAdmin Configuration
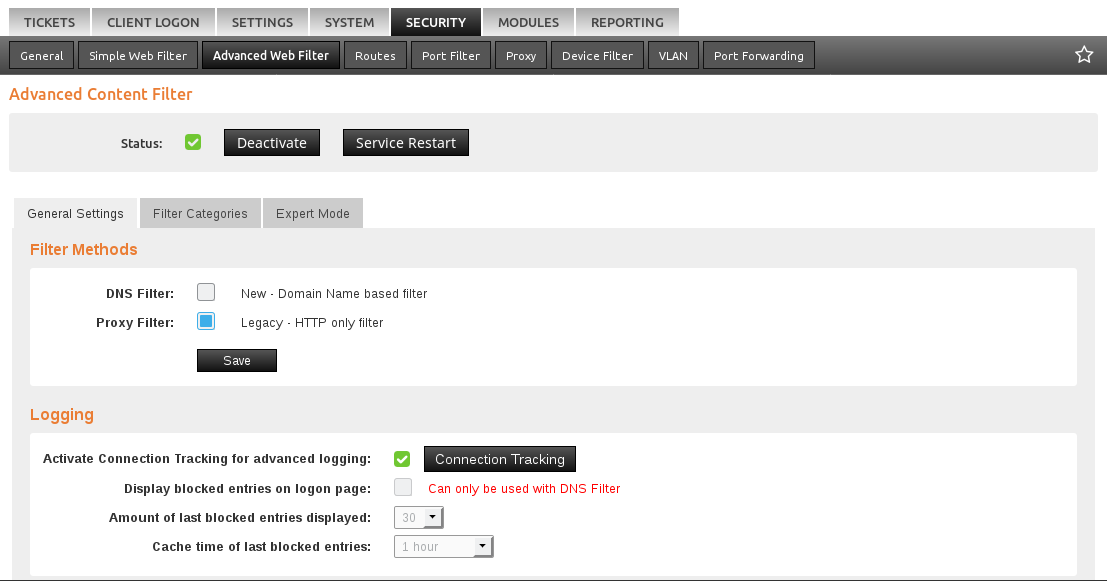
In order to activate the Content Filter (legacy), open the WebAdmin and navigate to Security / Advanced Web Filter and first click on Activate to initialize its settings. This will activate the required services and display available options for it. After the service was activated, following options will be shown.

The options shown are the DNS Filter (new) and the Proxy Filter, also referred to as Content Filter, which is the legacy option of the two. After selecting Proxy Filter hit Save before doing any further configuration.
Select Filter Lists
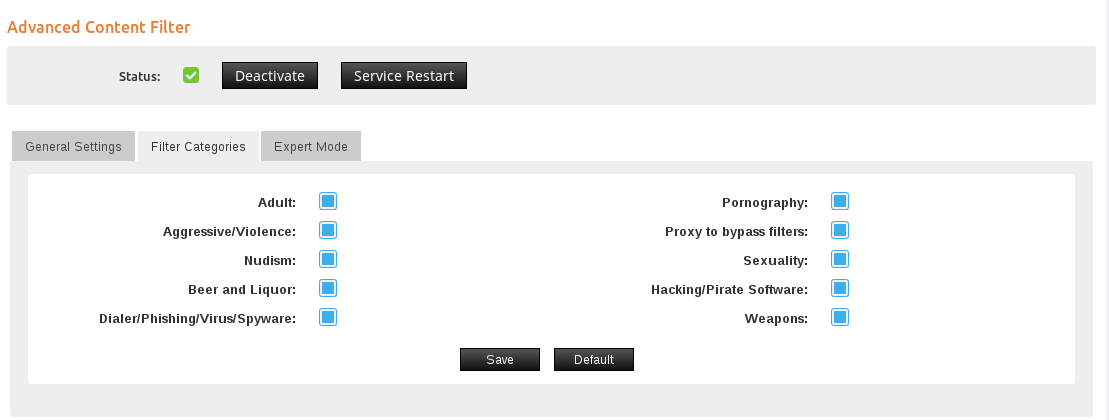
In the next step, the Filter Lists can be selected in the tab Filter Categories. Select all desired filters and hit Save to continue.

Advanced Settings
Attention
- If Force HTTPS connections via Content Filter is acivated, all active SSL connections will be forced over the proxy, which will inevitable lead to certificate errors. For any regular guest environments, this option will completely ruin the experience and usability.
The Advanced Settings allow you to to:
- Check for domains/URLs in the filter lists
- Manually add new domains and URLs to block
- Block specific file extensions and mime-types
- Work with word lists
- Set exceptions for all options above
A detailed description can be found in the help menu of this WebAdmin page. After the configuration is done, hit Save. This will write the configuration, but it is not yet active. In order to activate it, a Service Restart is required, which can be found on top of this WebAdmin page.