DNS Filter
Attention
- It is not suggested to use the Content Filter (legacy) and the DNS Filter at the same time - if in doubt then only use the DNS Filter
This manual describes how to configure and use the DNS Filter.
Hint
- The DNS Filter will filter all nameserver requests, which means clients wont be able to resolve blocked domains at all. As a result, this will prevent not only HTTP/HTTPS connections to filtered domains, but all connection types.
- In order to receive the newest Filter Lists, activate the DNS Filter, hit Service Restart and then perform the IACBOX Online Update
WebAdmin Configuration
In order to activate the DNS Filter, open the WebAdmin and navigate to Security / Advanced Web Filter and first click on Activate to initialize its settings. This will activate the required services and display available options for it. After the service was activated, following options will be shown.
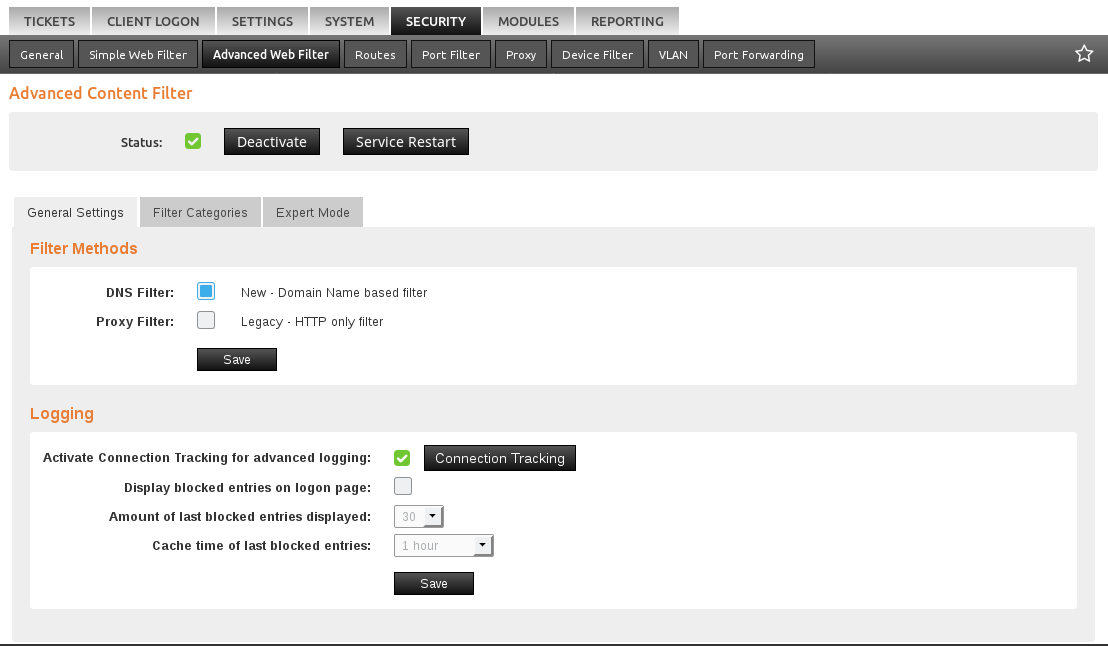
The options shown are the DNS Filter (new) and the Proxy Filter, also referred to as Content Filter, which is the legacy option of the two. If the IACBOX was freshly installed with version 17.2, the DNS Filter will be enabled by default. Upgraded IACBOXes will not automatically switch to the DNS Filter - this must be done manually.
Special Settings for the DNS Filter
Since the DNS Filter blocks the name resolution of unwanted target domains, connections to these will fail. This means that, if clients try to open HTTPS Webpages, their browser will return a simple The Page could not be loaded message. The problem with these is that the IACBOX can not simply redirect clients to a local Site has been blocked page, because webbrowsers would detect the certificate mismatch of the target domain and the Site has been blocked resource on the IACBOX and eventually output an aggressive SSL Certificate error. The approach with the DNS Filter is to list blocked DNS requests on the IACBOX Logon Page instead. In order to access the IACBOX Logon Page while being logged in with a Surf-Ticket, clients can call http://logon.now.
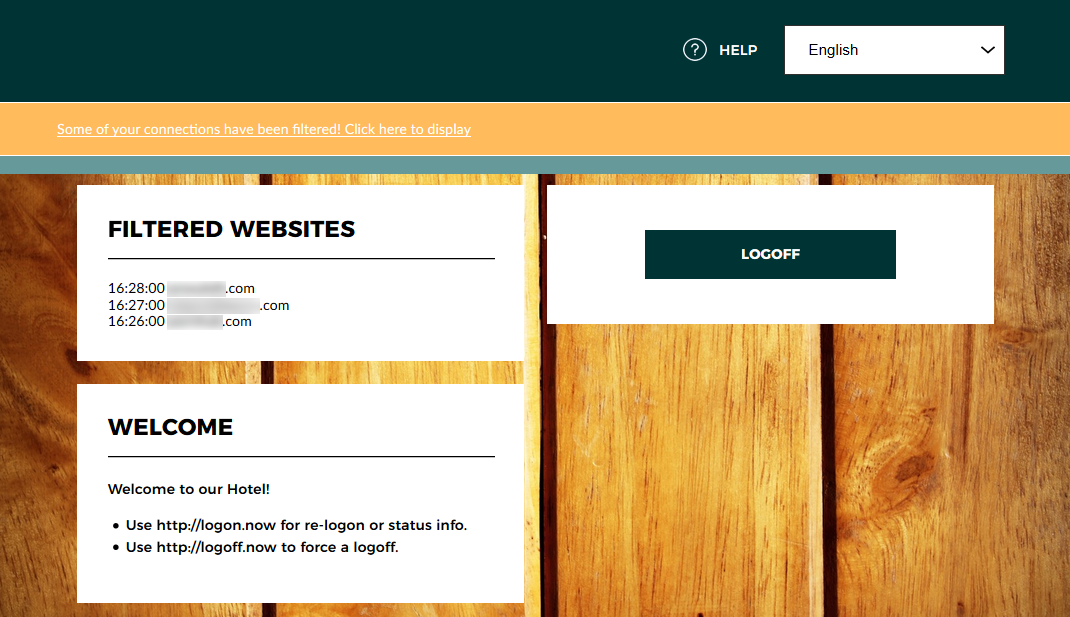
As seen in the screenshot, the IACBOX Logon Page displays a warning on top which states Some of your connections have been filtered! Click here to display. After clicking on this message, the Filtered Websites section will be shown above the welcome section.
Integrators can decide to configure these warnings in the Web Filter WebAdmin menu at Security / Advanced Web Filter. Available options are:
- Activate Connection Tracking for advanced logging - The Connection Tracking must be activated in order to obtain and save the DNS requests of clients. Once activated, the configuration below will become accessible.
- Display blocked entries on logon page - Integrators can decide to either show or hide blocked DNS entries from guests. If the Connection Tracking was activated before this step, administrators can review blocked connections in Tickets / Manage by clicking on the Web Filer icon to the left of the ticket name. This will open the Connection Log of this ticket, which includes filtered entries.
- Amount of last blocked entries displayed - The amount of filtered entries which should be displayed on the Client Logon Page.
- Cache time of last blocked entries - The time in which filtered entries are being shown on the Client Logon Page.
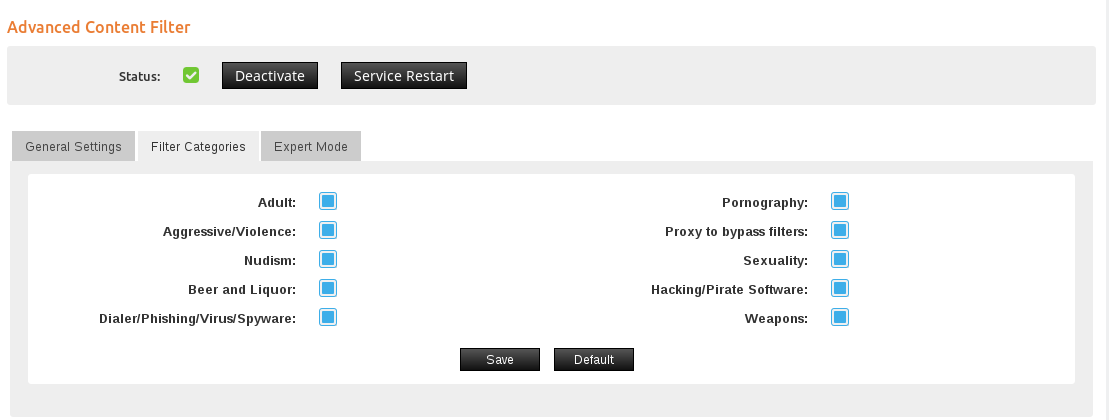
Select Filter Lists
In the next step, the Filter Lists can be selected in the tab Filter Categories. Select all desired filters and hit Save to continue.
Advanced Settings
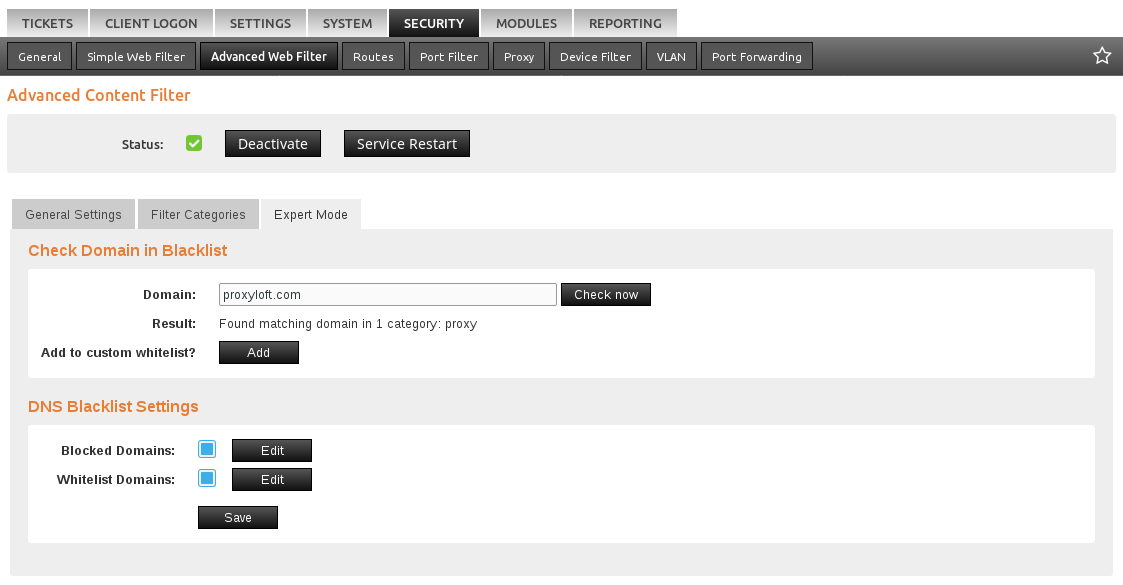
The Advanced Settings allow you to to:
- Check for domains/URLs in the filter lists
- Manually add new domains to the filter- and whitelist
- Upload a Custom Domain List to block or whitelist alot of domains at once
A detailed description can be found in the help menu of this WebAdmin page.
After the configuration is done, hit Save. This will write the configuration, but it is not yet active. In order to activate it, a Service Restart is required, which can be found on top of this WebAdmin page.